This page describes the Preferences menu of XCTrack. Check the other sections to lean more about the different features of XCTrack.

Videos have been produced to explain the different features of XCTrack Pro. Check the videos tuto page to learn quickly how to use XCTrack Pro.
Click on the + sign to read the details.
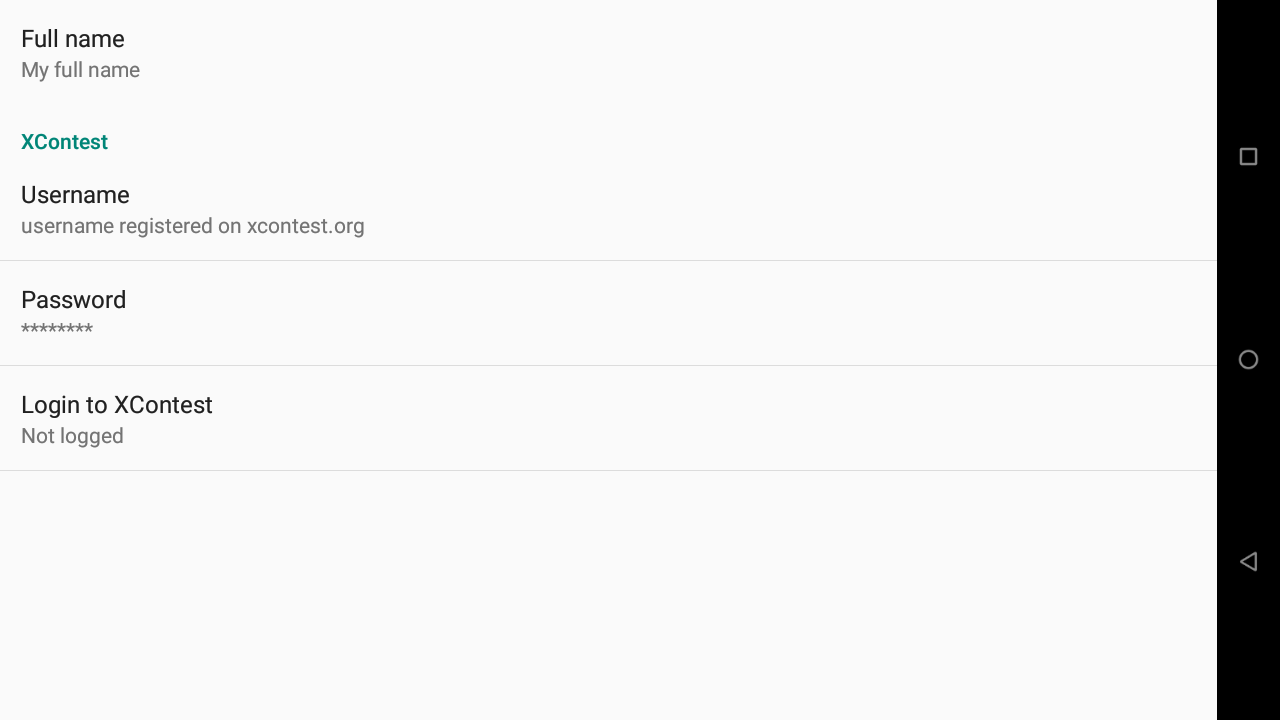
[accordion][spoiler title=”Pilot” open=”yes” style=”default” icon=”plus” anchor=”” class=””]Indicate your full name, the username you have registered on xcontest.org, your password and click on “login to XContest” to check that your details are correct (need an internet connection).
If you have not yet registered, Register on Xcontest website for cloud flights and advanced XCTrack features.
Read also other details regarding Livetracking Menu in Menu/Livetracking, as well as regarding the Livetracking widget in the Livetracking subsection of the XCTrack pro widgets manual.
Livetracking sends your positions every 60 seconds to a server and obtains the positions of other pilots 20 km away. If you want to see a track from another pilot using Livetracking, you can select a flight and then you get the track from another pilot and its position when the server obtains his data.
You can send messages to other pilots. Very little data consumption, around 100 KB / hour.
An internet connection is required to have the livetracking features working. With AIR³, the easiest way to get internet is to use a SIM card with data. Make sure that the data of your SIM card are working correctly by opening a browser and check if you can get internet webpages (you may need to enter the Access Point Name (APN) of your internet provider). Reminder: you have to restart AIR³ after inserting the SIM card. Use the standard SIM card size and insert it in portrait mode.
Alternatively, you can share your internet connection provided by your phone (wifi, bluetooth or USB ethernet) but this method is more complex to setup.
Livetracking enabled
Enable livetracking to use the livetracking features. By enabling livetracking, a new Livetracking menu appears to access the livetracking features while flying.
Position sharing enabled
If Livetracking is enabled, next time you will start XCTrack, a new window will appear, asking if you agree to share your position. Sharing your position is obviously required for the Livetracking to work. If you disable sharing (until next start of XCTrack), you won’t be able to be livetracked. However, the Livetracking menu will still be available, in order to select pilots to see on the map, or to send a message.
Claim to Xcontest automatically
Once you have activated Livetracking, you also have the possibility to enable automatic claim of your flight 1 minute after landing. Read more details about automatic and manual flight claim on Xcontest website in the Tracklogs page of XCTrack Pro Manual.
The flights are analysed by the server and only real flights will be claimed. If you want to test the Livetracking feature by using your car or by walking, the server will detect that this is not a real flight and you won’t be able to automatically claim to Xcontest.
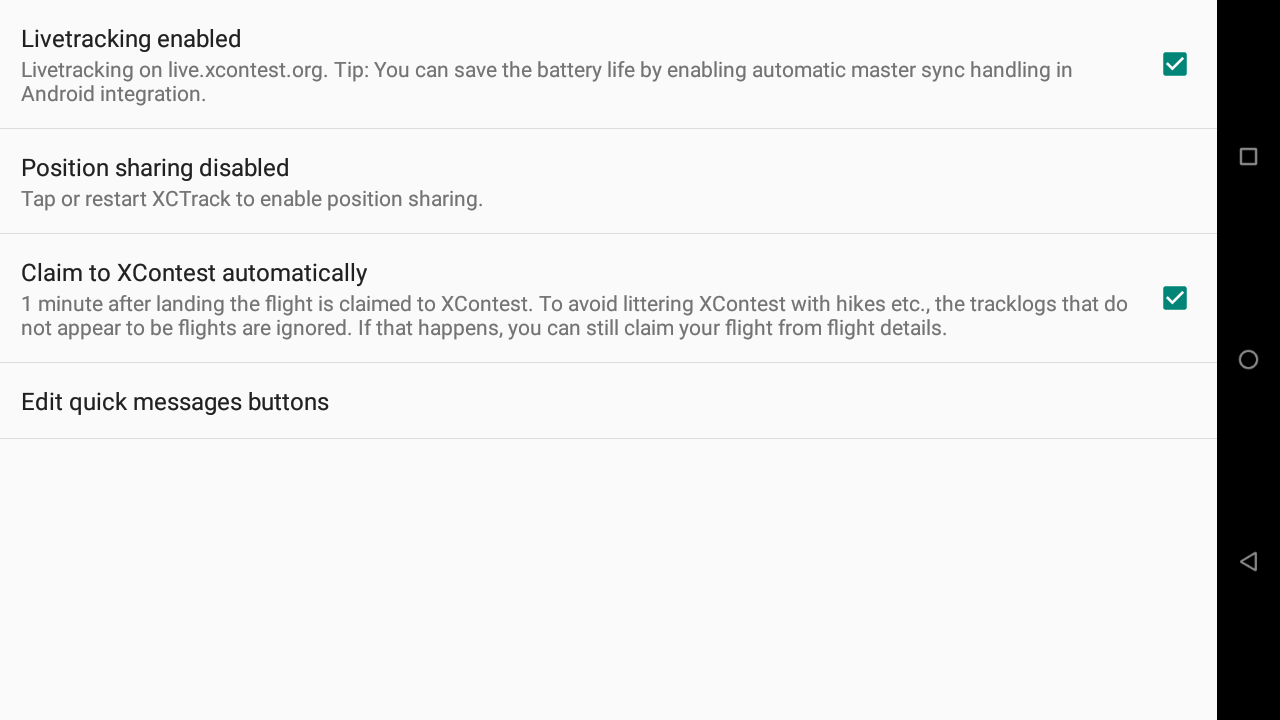

Edit quick messages buttons
Click on “Edit quick messages buttons” to access the quick messages buttons interface.
AIR³ is preloaded with different messages buttons. You can easily delete, edit them or create new ones.
Click on the + sign to create a new one.
Swipe right to edit

Swipe left to delete

Hold and move to change the position of the buttons

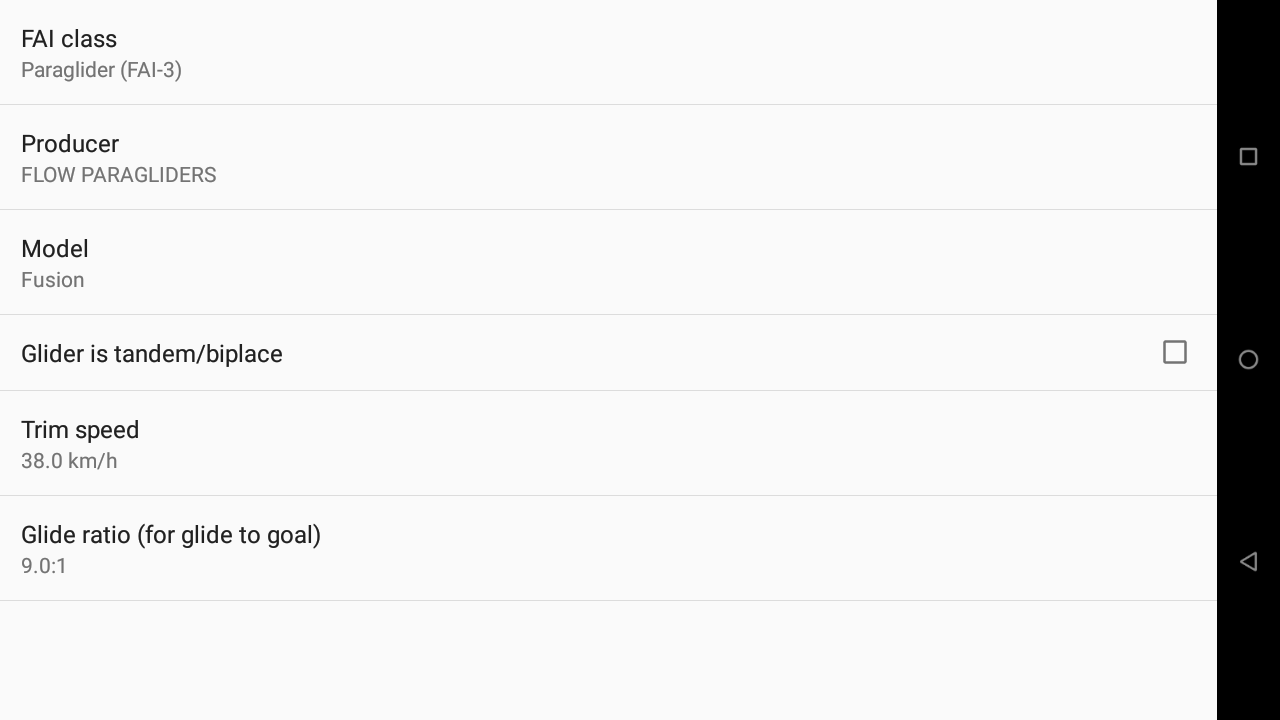
Set your aircraft (will be indicated within your flight when you upload your flight on Xcontest.org).
Set the trim speed and glide ratio.
Note that these two settings will be taken into account for the computation of different information during the flight.
Read more details about the influence of these parameters in the XCtrack Pro widgets manual. Example: Mark glide distance in the Map configuration of the XC map widget of the Xcontest subsection, Side view widget of the Navigation subsection, Mark glide distance in the Map configuration of the Task Map widget of the Competition subsection, Altitude over goal widget in the Competition subsection.
Set the XC parameters to determine how to determine if a triangle is closed or not and the multiplicative factor in case of flat triangle or FAI triangle.
Note the multiplicative factors of Xcontest World here.

This section allows you to set the QNH for all barometric altitude widgets. See Wiki for more details about pressure altitude, Flight levels and QNH influence.
You can set the QNH automatically or manually.

With the Pro version, you can automatically set the QNH from internet. You can decide to get the QNH either from nearest “Airport report” (Metar) or from the nearest weather station.


XCTrack syncs at start and then tries to sync every hour. If there is no signal, XCTrack tries more frequently until it gets the data.
Once the QNH is correctly set, the barometric altitude of the take-off should correspond to the known altitude.

Without the Pro version, you can set automatically the QNH before launch thanks to the GPS altitude. GPS altitude is known to not be as accurate. It is therefore recommended to set the
QNH either from internet or manually.
XCTrack syncs at start and then tries to sync every hour. If there is no GPS signal, XCTrack tries more frequently until it gets the data.
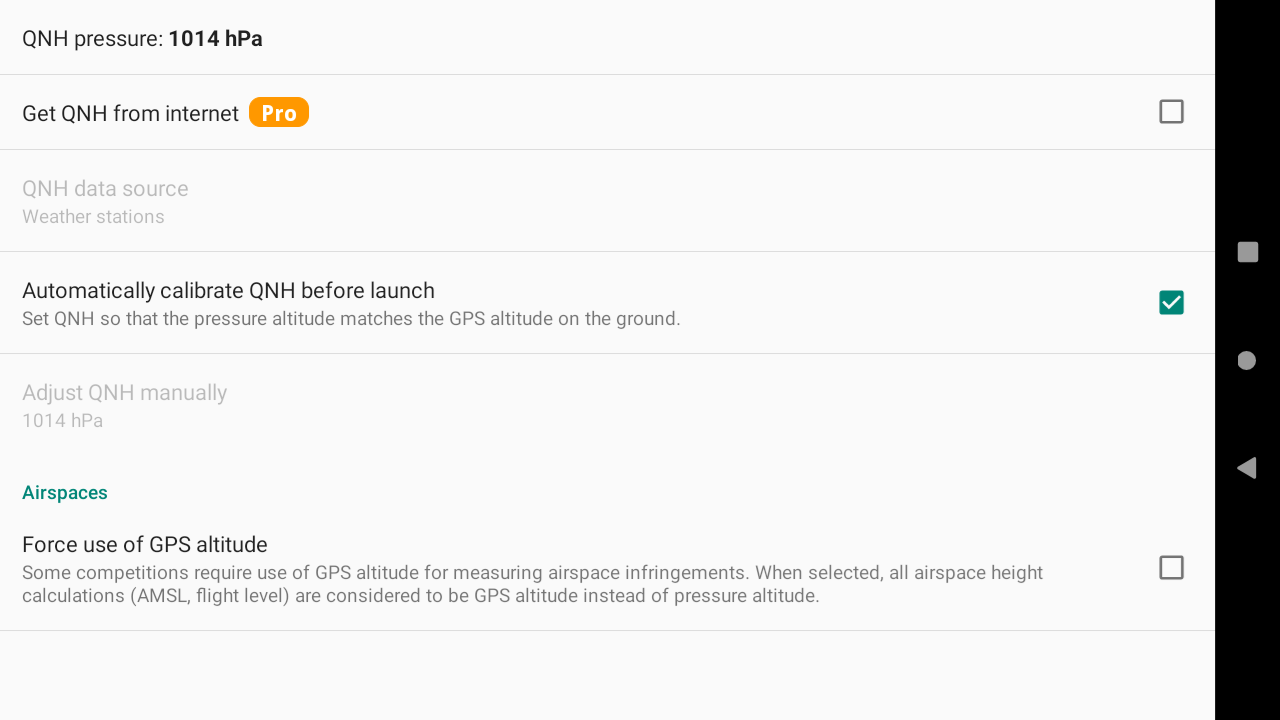
If you do not select to set automatically the QNH, you can also adjust it manually.

Airspaces: force use of GPS altitude:
Some competitions require the use of GPS altitude instead of Flight Levels for airspace infringement check.
Example, an airspace with a floor situated at FL55 should correspond to 1676m of GPS altitude, no matter the QNH.
With a high QNH, such Flight Level should be considered at a higher gps altitude and therefore allowing pilots to fly higher than 1676 m if the FL was considered as pressure altitude. By forcing the use of GPS altitude, these Fligth Levels are converted to GPS altitude.
This setting is the same as the one you can set in Menu/Preferences/Airspaces/Settings (see below for more details).
More information regarding airspace can also be found in the XCTrack Pro widgets manual. Read details about Airspace proximity in the Navigation subsection.
2 types of source can provide information for airspace to XCTrack: information coming from airspace.xcontest.org (see Web tab below) or information coming from an openair file (see Files tab below).
Airspace zones activation can either be determined based on a schedule (usually indicated in the AIP (Aeronautical Information Publication)), and/or based on Notam (Notice to Airmen). In order to know if a given prohibited zone is active or not, the pilot is supposed to read information in the AIP and check the Notams. Airspace.xcontest.org is a tool that is based on algorithms that analyse all these information in order to determine the status of each zone. This is fully automatic, but as any “robot”, it may contain errors.
AIR³ provides a second method to get updated airspace info through the Openair2AIR3 feature of AIR³ Manager. Read more details about the Openair2Air3 here.
However, an Openair file does not contain any info about scheduled activations for airspace zones. XCTrack not only gets information about the activated zones, but also the schedule for many countries (not all supported countries). Therefore, if your country is supported by XCTrack, including Notam support, we strongly recommend getting the airspace info from XCTrack, instead of an external Openair file.
The Web tab lists all the countries for which you can get airspace information from airspace.xcontest.org. To get the airspace information of a given country, first check the box next to the desired country and click on the “refresh” button to download the available information from airspace.xcontest.org (internet connection required). At each start of XCTrack, you will get the updated information downloaded (internet connection required). If you want the info to be updated after XCTrack is running, you will need to manually “refresh” in this menu.
Be aware that the Automatic data synchronisation in Android settings/accounts/accounts should be enabled. Otherwise, XCTrack will fail to automatically update the airspace info.
The countries containing Airspace zones activation determined by algorithms analysing Notams, NOTAM is indicated below the country.
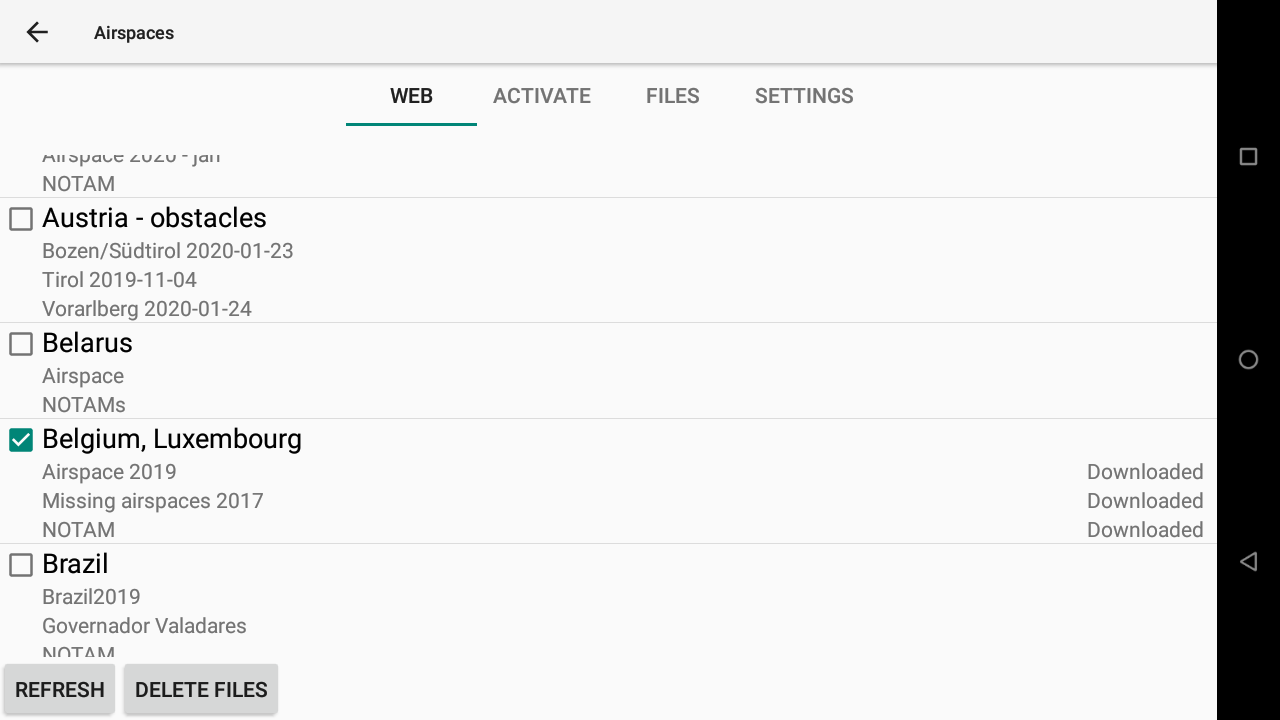

Obstacles (ski lifts, cables, etc.) can also be downloaded for specific countries separately.

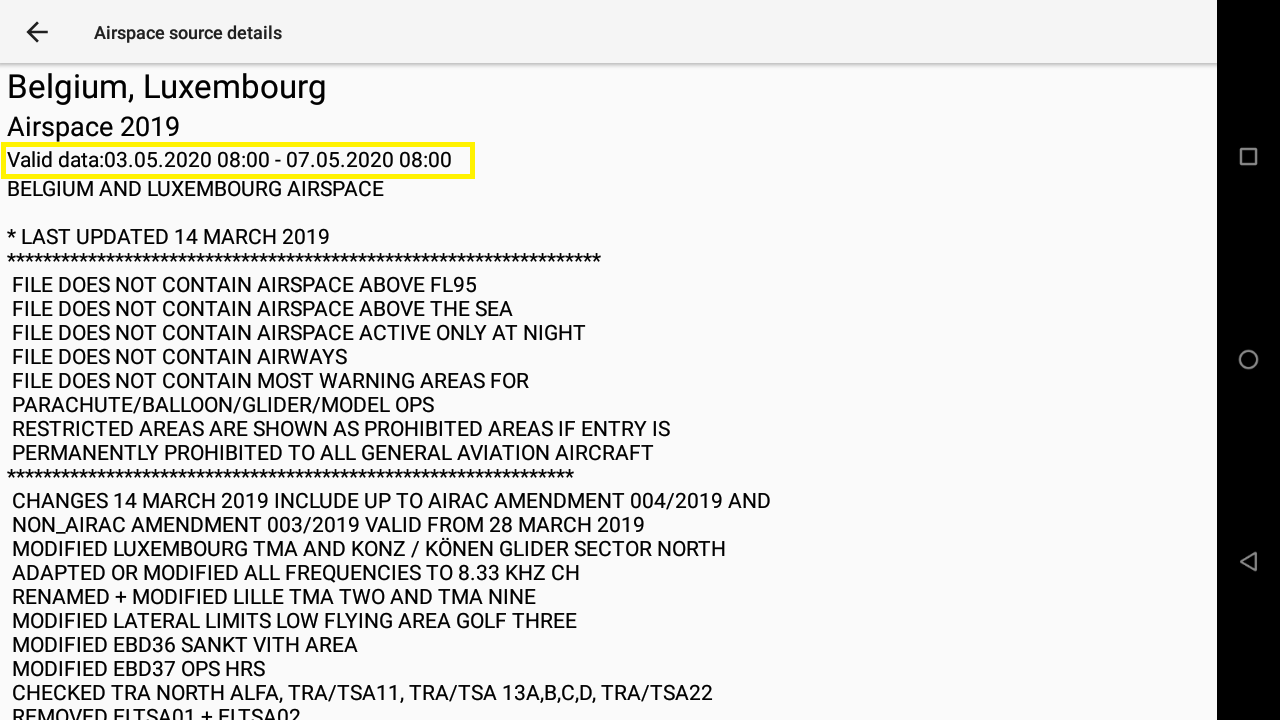
When the airspaces are not updated often enough, XCTrack switches to failsafe mode and displays all the airspaces as if they were all active. You can check the validity of airspaces by clicking on the country in the web tab of Menu/Preferences/Airspaces. This will bring up a new window, containing the validity period on top.
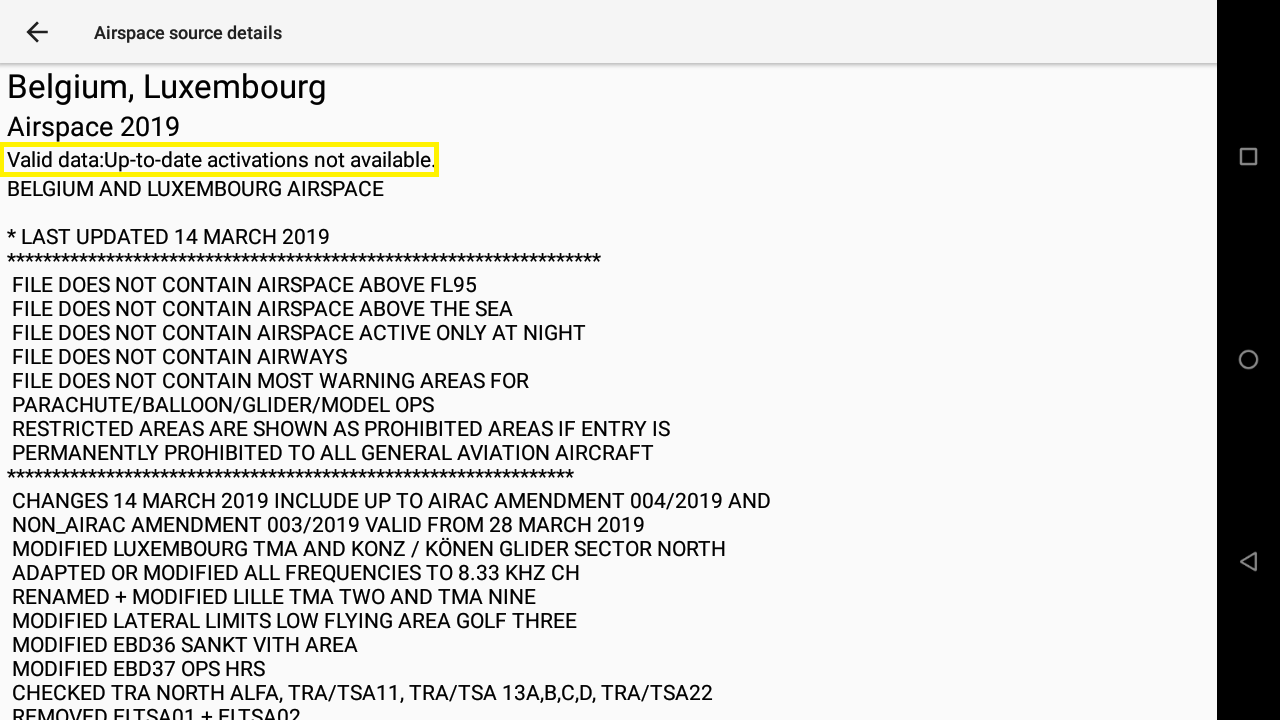
If the information is not recent enough, you will get a message “Valid data: up-to-date activations not available”.
If you want to update the information, just go back to the Web tab and click the “Refresh” button at the bottom after verifying that the country for which you want updates is enabled.
[_/spoiler]
The Activate tab lists all the different airspace zones either downloaded from the Web tab or provided by the Openair file activated in the files tab.

By clicking on a given zone, you can change its status.
By default, all zones are set on Automatic. For airspace zones that come from an Openair file, this means “active”. For airspace zones coming from airspace.xcontest.org, a schedule is provided together with the airspace zone, so that the activation status will be virtually active or disabled depending on such schedule. The airspace is shown on the map (read below explanations about color code) when it is active or will be active in the near future, hidden when it is not.
If you need to change the status, choose between disabled (for today or permanently) or active (for today or permanently).

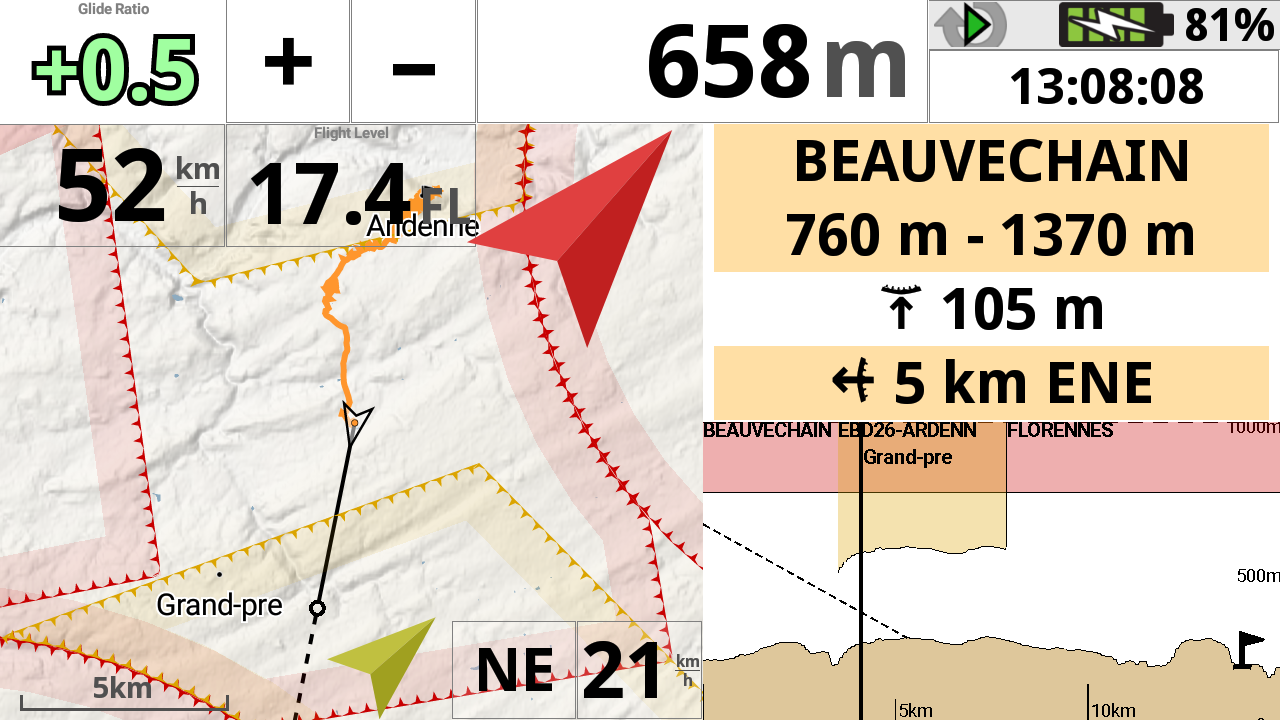
Airspace zones that will be activated in the near future will be displayed with ‘grey’ color on the map and in the side view. You will get a warning 15, 10 and 5 minutes before the airspace is activated if you happen to be just inside it.

XcTrack works with 4 ‘airspace’ types – Red (restricted), Orange (warning), Green (glider area) and Purple (obstacle).
A restricted zone (red) is drawn on the map, shown in the Airspace proximity widget and the Side view widget when active and generates events when you get near/inside. This zone will be greyed when it will be activated in the near future (see explanations above).
The orange zone (warning) is only shown on the map and the Side view widget but not in the Airspace proximity widget. No event is generated when you get near/inside. This zone will be greyed when it will be activated in the near future (see explanations above).
The green zone is shown on the map and the Side view widget and works in an ‘inverse’ manner – that one is designed for the gliding window airspace inside otherwise prohibited areas.
Using an OpenAir file, an AC Q zone is drawn orange, an AC W zone is drawh green, others are red. There is no schedule available with Openair files.
As indicated in the Main features page, you can also reach the Airspace zones directly on the map, through the contextual menu. Read more how to reach the zone through the contextual menu in the Main features page of XCTrack Pro Manual.

Note regarding zone activation: as indicated in the Web tab info, when the airspaces are not updated often enough, XCTrack switches to failsafe mode and displays all the airspaces as if they were all active. You can check the validity of airspaces by clicking on the country in the web tab of Menu/Preferences/Airspaces. This will bring up a new window, containing the validity period on top.
[_/spoiler]
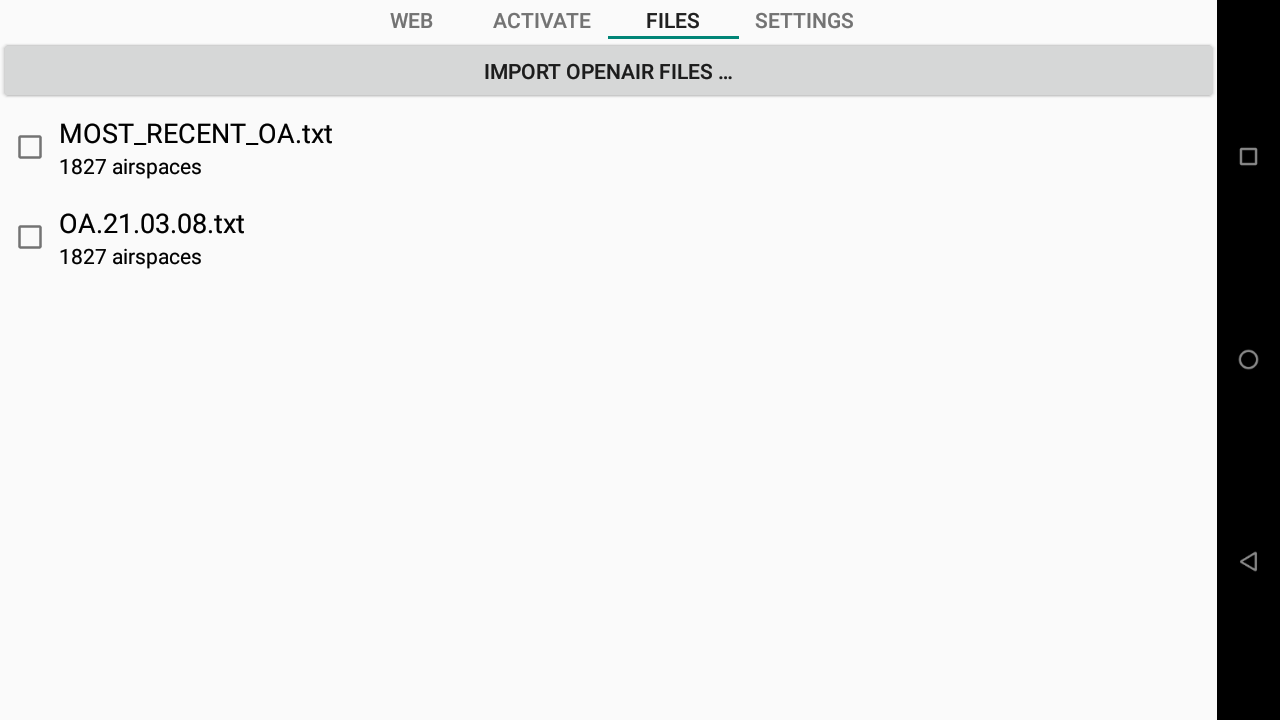
Openair files are text files containing information about Airspace.
All files located in the Airspaces folder of XCTrack will be listed in the Files tab. Click on the one you want to activate to enable it.
You can import an OpenAir file into the right folder by clicking on the Import Openair Files button on top.
If you want to delete an OpenAir file, keep your finger for 1 sec and confirm.
Most_recent_OA.txt is a file used by AIR³ Manager to update the Openair file you can get through the Openair update mechanism. See more details in the Openair2AIR³ page
[_/spoiler]
In order to use the Obstacles alerting, you need to select the country concerned in the Menu/Preferences/Airspaces/Obstacles. All countries are selected by default. Unless you deselect it, it’s selected.
Obstacles are downloaded if your device is connected to internet. In the Obstacles tab, you can select or deselect supported countries to be included in the Obstacles detection mechanism.
If you want to delete the Obstacles data previously downloaded, just tap on “Delete files”.
Obstacles of selected countries are refreshed at every start of the app, should there be any change made to the database. Alternatively, you can also refresh manually the Obstacles database by clicking on “Refresh”.
You can adjust the behavior of the Obstacles detection system based on the different Obstacle settings in Menu/Preferences/Airspaces/Settings. See more details below.

You can enable or disable the sound related to the Obstacle warning in Menu/Preferences/Sound in the Flight section.
You can enable or disable the visual warning through the map in the map configuration of the XC Map widget or the Task Map widget.
Obstacles detection mechanism: the algorithm calculates a possible collision with an obstacle based, on one side, on the ‘Glide ratio’ (set in Menu/Preferences/Aircraft) and your real glide ratio (the lower value is chosen) and on the other side on the ‘gliding speed’ (set in Menu/Preferences/Aircraft) and your real speed (the higher value is chosen) to determine the time to reach the obstacle. If you are turning, the calculated polygon is ‘slanted’ and widened (quite significantly) in the direction you are turning.
If an obstacle is found in the polygon within the time set in the Menu/Preferences/Airspaces/settings, the altitudes are checked. An intersection with an obstacle is computed. If you arrive lower than the obstacle altitude + safety margin, an alert is generated.

In the map configuration of the XC Map widget or the Task Map widget, an option “Show alert screen when approaching an obstacle” can be activated or deactivated. The enabled option will change a map into a special ‘zoomed in’ mode when you get near an obstacle, so that you could see clearly where you are and where is the obstacle.
You can either decide to use the “Automatic zoom in emergency obstacle mode” or select the map scale you want to apply in case of alert when approaching obstacle.

[_/spoiler]
Border rendering
If you disable this option, you will only get straight lines to determine the limits of the airspace zone. When you are close to it, it might be difficult to identify on which side of the line is the zone. With shark’s teeth, it is easy to identify it (teeth are placed on the side of the zone). When the scale of the map is large enough, you may want to disable this option for readability reason. You can therefore determine under which scale the shark’s teeth should appear on the map.
Fill rendering
Another way to identify more easily the zone is to use the fill rendering.
If you choose “Full”, the entire zone will be filled. Full filling may help you to make sure you can identify if you are vertically within the zone (inside, below or above)…. but this may decrease the readability.
“Border zone only” is used to only fill a portion of the zone, next to the limit of the zone.
In order to improve the readability, you may set the opacity of airspace filling with the slider.

Altitude Measurement: Force use of GPS altitude
As described in the Altimeter/QNH settings above, some competitions require the use of GPS altitude instead of Flight Levels for airspace infringement check.
Example, an airspace with a floor situated at FL55 should correspond to 1676m of GPS altitude, no matter the QNH.
With a high QNH, such Flight Level should be considered at a higher gps altitude and therefore allowing pilots to fly higher than 1676 m if the FL was considered as pressure altitude. By forcing the use of GPS altitude, these Fligth Levels are converted to GPS altitude.
This setting is the same as the one that can be found in Menu/Preferences/Altimeter&QNH above.

Obstacle alerting
Explanations about obstacles detection mechanism can be found in Menu/Preferences/Airspaces/Obstacles
You can set specific settings related to the behaviour of the Obstacle alerting mechanism.
- You can enable or disable the Obstacle alerting mechanism
- You can suppress next possible event for the time set, to avoid getting too many warnings
- You can set the flight time to collision, according to your current gliding speed or the Trim speed indicated in Menu/Preferences/Aircraft (the higher value is chosen)
- You can set the altitude safety margin to clear obstacle in order to only activate the obstacle alerting mechanism if your projected point of collision is within the obstacle altitude + safety margin.
Note that, even if you activate the option “Show alert screen when approaching obstacle” in the map configuration of the maps, nothing will happen if you have not activated the Obstacle alerting mechanism.

The pink line on the map corresponds to the obstacle if you have selected “Show only” or “Show and alert”.
The warning on top of the screen corresponds to the obstacle alert if you have selected “Alert only” or “Show and alert”.

Labels on map
For readability purposes, you may want to change what is displayed and for which map scale, vertical borders of airspace zones are displayed.
The first option is to skip “AMSL” shortcut in labels.
The second option is used to make sure you still get the vertical borders for temporary airspaces, even if it is supposed to not be displayed based on the option to only show the labels below a given scale.
The third option allows you to show the labels for obstacles or not.
If you disable the option “show for map scale below XX”, the labels will always be displayed. Otherwise, they will only be displayed for map scale below the set distance.
If you want to avoid labels on all the maps (Xc map, Task map or thermal assistant widgets), set the lowest value for the “show for map scale” slider.

Event triggering
Once you get close to an obstacle or a restricted airspace, you can trigger events and combine the event triggering with a warning display.
As indicated in the description of the Airspace proximity widget of the navigation subsection of the XCTrack Pro widgets manual, different colors (color code) are used depending on your proximity with the airspace zone.
A ‘scaled distance’ is used to determine the level of proximity with the airspace zone. Vertical distance and horizontal distance are taken into account to determine the ‘scaled distance’ with a ratio of 4:1, giving more importance to vertical distance proximity versus horizontal distance proximity.
If you cross a prohibited airspace zone, a purple warning event will be triggered (Airspace crossed).
If the pilot is below the airspace zone (horizontal distance away from the border of the zone is 0 m), a red warning event will be triggered (Airspace is really close) once the vertical distance is 100 m. An orange warning will be triggered (Airspace is close) once the vertical distance is 500 m. These vertical distance limits will decrease while you are away from the zone.
For each warning event triggered, you can decide to show an event notification overlay and also suppress next possible event for a defined period.
In the Flight subsection of Menu/Preferences/Sound explained here below, you can enable a sound in relation with these events.
In the Mapping of events subsection of Menu/Preferences/Automatic actions explained here below, you can link an action to the triggered events.
Do not confuse these “warning colors” with the Airspace colors described here above in the Airspaces description (red for restricted, orange for warning, purple for obstacles).

Nearby airspace discovery
Set how far you want XCTrack to look for a nearby airspace. This will affect maximum distance settings in Airspace proximity widget described in the navigation subsection of the XCTrack Pro widgets manual.

Watch the video produced for Maps and elevation in the videos tuto.
Read details about XC map in the Xcontest subsection and about Task map in the Competition subsection in the XCTrack Pro widgets manual.
2 types of maps can provide information to XCTrack: ground altitudes (Elevation/Terrain) directly downloadable from XCTrack and Road maps.
Maps and elevation files are preinstalled with AIR³, based on your location. However, as maps are large files, you may want to add or remove maps. You can free up memory by removing some pre-installed maps. You can use a SD card to extend the memory capacity. Optionnaly with AIR³, you can purchase a 128 Gb SD-card with pre-installed country maps of the world.
RoadMaps provide a lot of information while you navigate. Cities, roads, rivers, forests, railways,…
To download elevation files, just click on the country and click on “Download” (internet connection required).
Make sure that “Display terrain map” is enabled in the Map configuration of the XC map widget or the Task map widget of your page. Read more details about the XC map widget or the Task map widget in the XCTrack Pro widgets manual.

The Roadmap tab allows you to manage your Roadmaps and/or to select the Roadmap theme.
In order to display Roadmaps, don’t forget to enable “Display road map” in the Map configuration of the XC map widget or the Task map widget.

Map theme
You can choose between different map themes. You may need to change the map theme according to the default theme chosen in the settings of Menu/Preferences/Display. For example, you may want to change the map theme into a black theme and choose the black high contrast theme as main default theme for XCTrack, to keep the whole display with black and reduce energy usage.

However, you still have the opportunity to also choose a different display theme for each map widget in the settings of the XC map widget, the thermal assistant widget or the Task map widget. Read more details about the main display theme or specific display theme for a given widget in the Display section of XCTrack Menu/Preferences/Display here below.
The Map theme can also be customized. For example, size of the cities and towns can be displayed with a larger font by customizing the xml file used by XCTrack. Read more details in this FAQ, how to use a custom Roadmap theme xml file.

Default size
Using larger font to display cities
MAP files
To add new Roadmaps, you can either manually download new Roadmaps and copy/paste the new files into the RoadMap folder or use the Map manager (see details below).
To add new Roadmaps “manually”…
Get the “country.map” file from Openandromaps.
Note that the file you will download will be a compressed file (ending by .zip). You can’t use that file as is. You will need to uncompress it thanks to an app such as Zarchiver for example. You can easily find such app in Play store.
Unzip the compressed downloaded file with an app such as Zarchiver. Copy/paste the .map file in the RoadMap subfolder of the Map folder of XCTrack.
You don’t need the additional file (.poi) that is usually included in the zip file.
Restart the AIR³ and make sure that “Display road map” is enabled in the Map configuration of the XC map widget or the Task map widget of your page.

To add new Roadmaps, remove or limit the selection of Roadmaps with the Map manager…
Click on “Manage maps” button in Menu/Preferences/Maps/Roadmap.

The Maps Manager allows you to
- change the directory where the Roadmaps are located (on top)
- select which Roadmaps XCTrack should load at start or delete any available Roadmap (left window)
- download new Roadmaps from OpenAndroMaps (bottom).
- view details of processing a Roadmap download and extraction.

1/ Change the directory where RoadMaps are located
Depending on the version of Android you are using, you can change the directory where Roadmaps are located. With recent Android version, you can only select if you want to use the internal memory or the SD card (if the device has any).
With older version of Android, you can choose the directory where the Roadmaps are located. Click first on the pencil to enter the directory selection window. Click on the 3 dots if you want to change the main memory support (change to SD card if the device has any). Select the directory where the Roadmaps are located.


2/ Manage available Roadmaps
The main window on the left allows you to select which Roadmaps XCTrack should load at launch.
If you want to delete a Roadmap file, you can either use the File Manager to remove the file from directory where Roadmaps are located, or directly click on the trash in this Maps manager to delete the Roadmap file.


3/ Download new Roadmaps
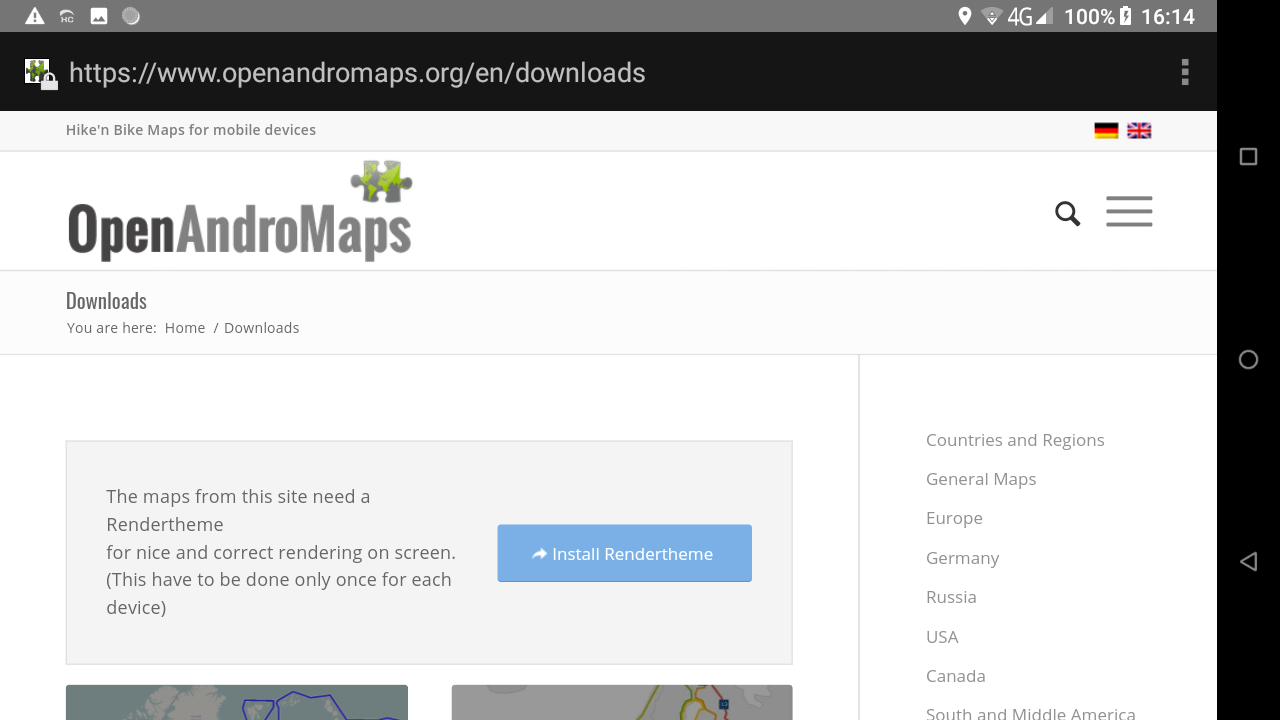
If you want to download new Roadmap files, click on the link at the bottom of the Maps manager. The browser opens on the OpenAndroMaps website.
- Browse among the different options to locate the continent and then the country you want to obtain.
- Click on the + sign to get the list of downloadable objects.
- Click on the “Install others” button to initiate the download process and click on Yes to validate the start of the download.
Remember that Roadmap files are large files. The download process can last long.
4/ Check the process
During the process, you can check details in the right window. If the map has been downloaded but the processing stage fails (for example there is no space left on the device), you can manually reprocess the downloaded file or delete it. When the downloaded zip is processed (= extracted to a map folder), it is deleted and disappears from that second list on the right.


At the end of the process, the system will unzip the compressed file just downloaded. You can follow the process on the right window. When the process has finished, the new Roadmap is available in the list of available countries in the left window.


If you are not patient enough to download these RoadMaps, an alternative is to get a 128 Gb SD-card with pre-installed coutry maps of the world. This way, you only need to get the large country file you need directly from the SD-card.
See next section for more details about Acoustic vario.
Automatic volume
By selecting “Turn up the volume on startup”, you can set the sound volume of the system to a defined level. The sound event volume is therefore determined by this setting. No matter what
was the sound volume of the system, this setting allows to define a specific sound volume.
The percentage of acoustic vario volume, described underneath, is a portion of the system volume set by this specific feature. For example, if the Pre-set volume is 50% and the Acoustic
vario volume is 50%, you will get 25% volume out of the maximum.

When you launch XCTrack for the first time, a window prompts you whether you want to maximize the system volume. Click Yes to set it to the maximum or click No if you do not want to increase the volume to the maximum. If you click “No”, the system volume will not be changed. Remember that the level of the Acoustic Vario is a percentage of the system volume. If the system volume is set to 50% and you choose “No”, the acoustic vario set to 50% will produce a sound that is 25% of the maximum.
You can have the system remember your choice not to have to answer the question on every launch. Go to Menu/Preferences/Sound if you want to change your choice.

System
You can enable or disable XCTrack to play a sound for various events related to system, flight, competition, livetracking or when you click on a specific widgets.
In order to trigger the events related to Airspace (Crossing airspace border, Airspace red warning, Airspace orange warning), you need to enable the Event triggering as explained in the Airspaces section, in the settings tab, here above.

Acoustic vario can be enabled or disabled. It requires a pressure sensor (external or internal). We recommend to always use the internal very performing pressure sensor of the AIR³. Watch and listen to the video comparing AIR³ vario with its competitors here.
You can also use the vario button widget explained in the Action buttons subsection of the XCTrack Pro widgets manual to enable or disable the vario sound. Note that both the vario and the weak lift indication (thermal sniffer) are enabled or disabled with this setting.
Mute audio when not flying
Enable it to avoid unwanted sound before takeoff. Once the takeoff is detected (see more details in Automatic actions section below), the vario sound will be unmuted.
Warn if baro data not available
When the pilot uses an external device connected to XCTrack for Acoustic vario, XCTrack will warn the pilot if the device is disconnected. Listen to the disconnected warning sound.
You can enable or disable this sound. Check also more details in the Connections & Sensors subsection below.
See next section for more details about Custom sound.
Volume indicates the percentage of volume based on the current OS volume. If the Android volume is 100% and the volume of vario is 50%, you will get a volume of 50%. If the Android volume is 50% and the vario volume is 50%, you will get 25% volume. To make sure you always have the same volume while flying, it is recommended that you activate the option Set volume to maximum that is detailed in the Android integration section below. Otherwise, the sound volume may be different depending on the way the Android volume has been set prior to your flight.
Lift Audio threshold is the value for which the vario will start making a sound to indicate a lift. This is also the upper limit of the weak lift indication.
Sink Audio threshold is a value that can help you identify a fall in a descending air mass. An easily recognizable specific sound will be played when you reach this value.

Weak lift indication volume is the way to identify weak air mass going up. It is a ‘double beep’ on the same tone. It beeps in the (-0.5, lift threshold) range. It beeps only when the short average > long average, as to avoid sudden double-beeps during lift and also suggest that you are moving to a faster-lifting air. Remember that in calm conditions, you are supposed to go down. If you are not going down (example – 0.1 m/s of vertical speed), it means that you are flying in an ascending mass of air.
If you don’t want to hear the weak lift indication, set the volume to 0%. If you want to hear it, set a volume. The percentage indicates the percentage of volume based on the current OS volume. If the Android volume is 100% and the volume of weak lift indication is 50%, you will get a volume of 50%. If the Android volume is 50% and the weak lift indication volume is 50%, you will get 25% volume. To make sure you always have the same volume while flying, it is recommended that you activate the option Set volume to maximum that is detailed in the Android integration section below. Otherwise, the sound volume may be different depending on the way the Android volume has been set prior to your flight.
Averaging interval is used to compute a value to determine ascent or descent, out of the data that are provided by the pressure sensor (see Menu/Preferences/Connection & Sensors/Calibrate here below. Note that the averaging interval of the acoustic vario has no influence on the averaging interval that can be set in the Vertical speed widget, the Vario Bar or the Glide Ratio explained in the Flying subsection of the XCTrack Pro Widgets manual. Acoustic vario and these widgets both use data from pressure sensors, but different strategies can be adopted to obtain average info. You may want to get a very short average for acoustic vario, but want to have visual information on the strength of the thermal based on a much larger time interval.
Average lift indication can be enabled or disabled if you have not activated the Custom sound described here below (Classic mode). Average lift indication is a feature that changes the “color” of the tone depending on the strength of the lift. The tone changes once you get in the 0.5-1.5m/s range (averaged in the value set in the next feature, 10 s by default), and then from 1.5-2.5 it starts doing ‘tik-tak’, 2.5-3.5 ‘tik-tak-tak’ etc.
Averaging interval for strength indication is the value taken into account by the average lift indication described here above.

Custom sound is a Pro feature of XCTrack. If you are using a standard version and want to get the custom sound, consider subscribing (see more details in the section Subscription & Pro below.
To access the custom sound features, start by enabling it (click on the menu).
Dynamic frequency
Can be enabled or disabled. By enabling it, the frequency will change during the time interval set in the Cycle/Duty explained below depending on the variation of your lift/descent.
Reset to profile
Gives you access to specific profiles.
Save/load sound profile
Save your favourite profile once you are happy with your customisations. The saved profile can be found in the SoundProfiles folder of XCTrack (see files with .xcvsp extension).

Custom sound
You can customize the vario sound through 3 different parameters: frequency, cycle and duty.
Click on the parameter you want to change. You can set a value for each step going from a descent of 7 m/s to a lift of 7 m/s. For each step, you can either slide up or down your finger to increase or decrease the value, or directly set a value manually by tapping on the number on top.
Frequency
Frequency changes the pitch of a tone (Hz).
Cycle
Cycle is a total duration of a tone and a pause (ms).
Duty
Duty is the proportion of a tone duration in each cycle (%)

To listen to the vario sound, unmute by tapping on the speaker button.
You can decide to hear the vario sound either based on the pressure sensor info provided to XCTrack, or by using the slider at the bottom, allowing you to test the sound for the different steps of lift or descent.
Another way to hear the custom sound is to replay one of your flight. Read more details how to replay a tracklog in the Tracklogs page.
The slider contains a thick portion. This corresponds to the range between the sink audio threshold and the lift audio threshold. If you have not set a value for the weak lift indication volume, this means that you will not hear any vario sound between these two values. Read more about the Weak lift indication volume, the sink audio threshold and the lift audio threshold here above.

Language
By default, XCTrack will use the language set for the OS. However, you may want to use a different language.
Most Roadmaps are available with local language (for example, you are flying in Korea) and in English. If the language set in XCTrack (example “German”) is different from the local language (Korean) or English, the local language will be displayed on the map. In this specific case, set the language of XCTrack to English to get latin characters. You can check which languages are supported by the roadmap on https://www.openandromaps.org/
Units
Check more details about units used by many widgets in the XCTrack Pro widgets manual
Theme
You can choose between 5 different display themes. However, note that the display theme chosen will be influenced by the Map theme selected (see Maps details above). Using AIR³ Manager, you can select a theme for XCTrack and AIR³ Manager will choose both the right Map theme that fits with XCTrack display theme.
As described in the General information regarding widget configuration in the XCTrack Pro widgets manual, each widget can be set with a specific theme.
You can for example use a Black theme for the main theme and use a white theme for the map. AIR³ is using 30% less energy with Black theme compared with White theme. However, not all pilots will get used to read the map with Black theme. You could set the map widget (See XC Map widget, Thermal assistant widget or Task map widget in the XCTrack pro widgets manual) to use a White theme while the main display theme is Black, such as with the following screenshot.

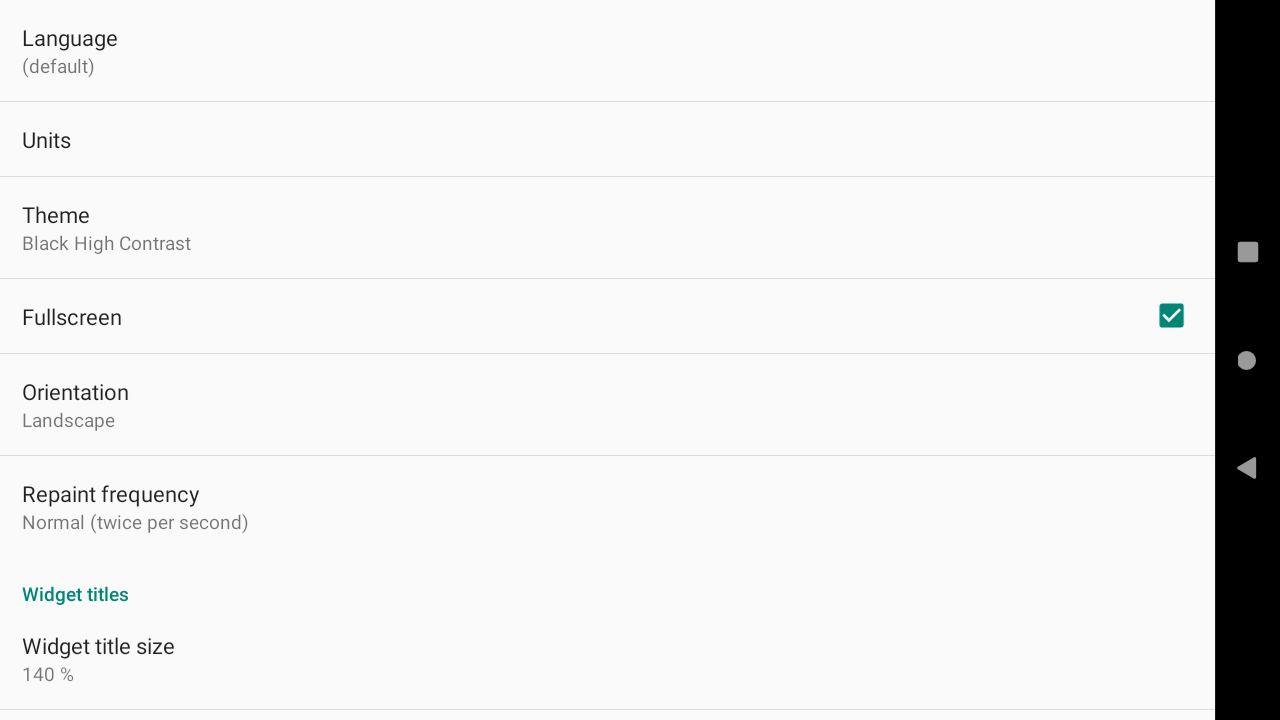
Fullscreen
XCTrack is usually used with full screen. However, if you want to keep your Android icons on top and the system buttons on the right, you can disable the “Full screen” option.
Orientation doesn’t require more explanations.
Repaint frequency
Finally, you can also change the “Repaint frequency” for quicker or lower repaint of the screen, but take into account that this will influence the energy consumption.
Widget titles
These preferences will influence all the different widget titles on all pages as described in the general information regarding widgets. Check more details in the General information regarding widget configuration of the XCTrack Pro widgets manual.
")

You can change the widget titles size (from 70% to 320%).
You can use a normal or a condensed font.


You can apply an outline to the widget (or not).
In addition, with the Pro version, you can also change the Widget title color and the Widget title outline color.

ActiveLook support
Support for glasses with HUD – https://www.activelook.net/
- First install the official ActiveLook application and update the firmware of the glasses
- The glasses can reasonably display only english texts. Events are directly in english, all other text are converted to ASCII
- The refresh interval is set to 1 second. There is not much bandwidth available between the glasses and XCTrack.
Select a device
Once you have turned on Bluetooth, first select your device.
XCTrack needs to upload certain things (mostly fonts) into the glasses. When the glasses are first connected, these things are uploaded. It takes about a minute.

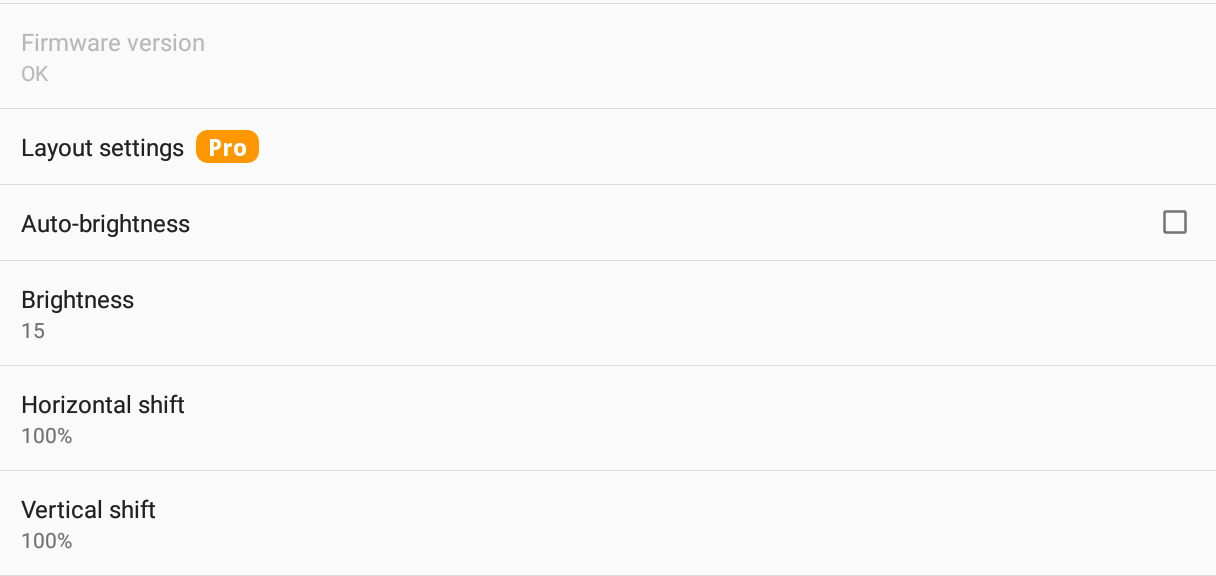
Layout settings
The non-Pro users can use the built-in layout (which will likely be subject to change in future releases), Pro users can build their own layout in a similar way as normal XCTrack pages.
Auto-brightness
The sensor on the glasses provides hand-motion sensor and ambient light sensor. According to the docs it is supposed to consume up to 50% of the available energy.
The hand-motion sensor is not implemented in XCTrack.
You will probably save a lot of energy when you disable Auto brightness (you will likely set the brightness to max anyway).
Brightness
Set the desired brightness
Horizontal and vertical shift
0 is the center of the glasses. -100 is the left edge. 100 is the right edge. You can shift the display according to your preferences.
Customize layout
In a very similar way you can customize the page layout as described in the XCTrack Pro widgets manual, you can also add widgets, delete widgets, change the widget configuration, resize widgets, so that you can customize the layout of the information displayed on your ActiveLook glasses.
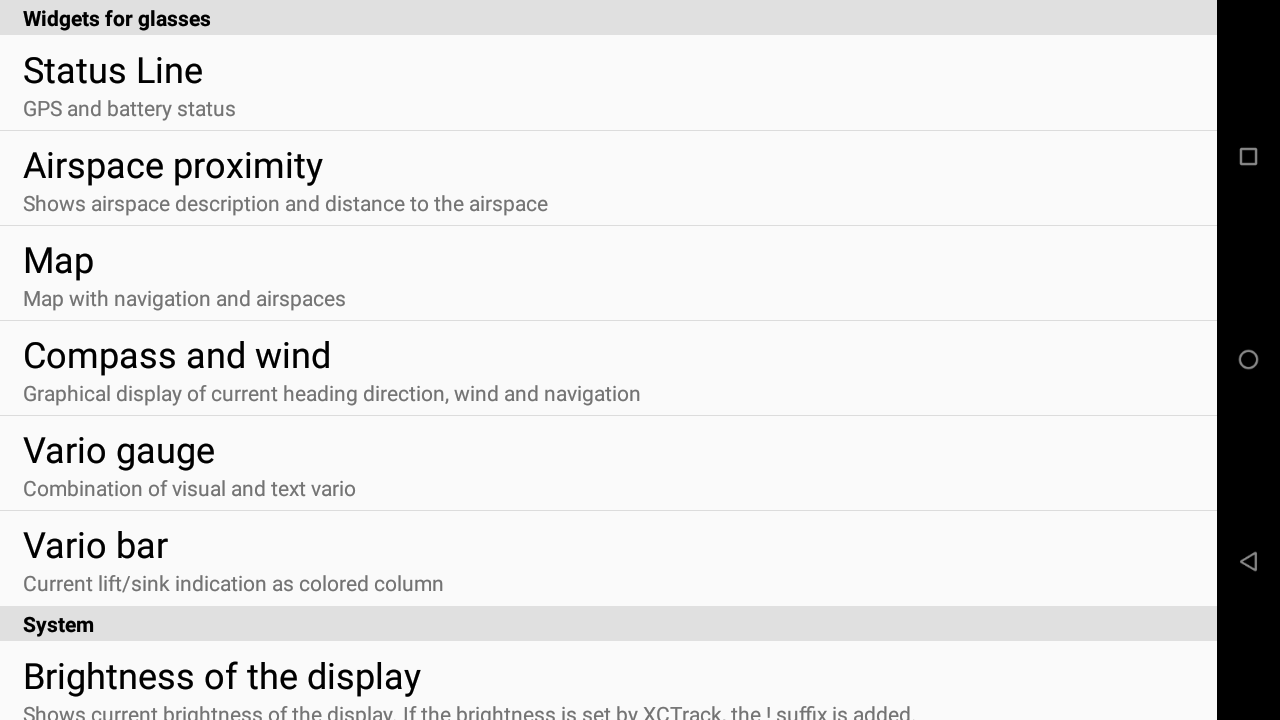
To add a new widget, click on “Add widget” button in the top menu.
- Widgets that had to be modified to better fit the limited environment are now located in the “Widgets for glasses” section.
- Widgets that are available to customize the layout for glasses without change in the configuration are located in the same section as described in the XCTrack Pro widgets manual.
- Widgets that are not available to customize the layout for glasses are not present in the list.
To configure a widget, select it first by clicking once on the widget. Then, either click in the center, or click on “Configure widget” button in the top menu.
When 2 widgets are located at the same place, click on “Bring to Front” or “Send to Back” after selecting the widget that you want to bring to front or send to back.
- When widgets overlap, the top one with at least some data wins; all widgets that are under an active widget are hidden
- You can overlap more text widgets, use the widget settings to hide both title and value when no data is available


To delete a widget, select it first by clicking once on the widget. Then click on “Delete widget” button in the top menu.
To move or resize a widget, select it first by clicking once on the widget.
- To move it, keep your finger in the center and swipe it to the desired area. Once you are happy with its location, lift up your finger.
- To resize it, keep your finger in the corner that you want to resize and swipe it up to the area that corresponds to the right size.
If you want to reset the layout to the last saved version or to the factory layout, click on “Reset layout” button and click on the appropriate choice.
Once you have made the desired customisation, click on the back/triangle Android button, to come back to the settings of the ActiveLook Glasses.
A change in the Layout is applied immediately when you exit the layout configuration screen.

The “Device information” shows versions of the different components.
Battery shows % of the available battery (also available in the status bar of the glasses).
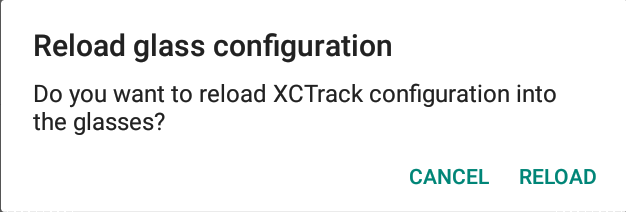
Click on “Reload glass configuration” to reload the items that were initially uploaded into the glasses at first connection.

AIR³ is preconfigured to take advantage of its large screen and the different specifications (sensors, brightness, physical buttons, etc.). Through AIR³ Manager, you can select different profiles according to your level (Kiss, Easy, Expert) or your sport (paramotor, balloon,…). Go to AIR³ Manager menu (3 dots on the top right) and choose XCTrack interface. Once you have selected the profile and theme, click on “Change interface” and validate to apply the changes in XCTrack at the next XCTrack start. AIR³ Manager will interface with XCTrack to configure the pages, the settings according to your level or your sport. You always have the opportunity to add or remove pages, change any layout or any settings in XCTrack.
At any time, if you are not happy with the changes you have made, you can reset all XCTrack changes with AIR³ Manager by clicking on the Reset button in the XCTrack interface menu of AIR³ Manager.
IMPORTANT NOTICE: if you change the profile or reset XCTrack settings with AIR³ Manager, you will loose any layout customisation you could have applied. If you want to return to your previous configuration, don’t forget to first export your configuration.
Pages layout allows you to create a new page (click on the + sign).

When you create a page, select the type of page you want to create.
Choose thermal assistant if you want to automatically switch to this page once a thermal is detected, with the default settings for such page (see more details in the “Automatic actions” section below). If you have created more than one page “thermal assistant”, the last one will be used for the automatic action. Do not confuse the Thermal assistant widget explained in the Air subsection of the XCTrack Pro widgets manual with the Thermal assistant page. The “Automatic action” is linked to the page and not the widget.
Choose XC Assistant or Competition to create a new page with the default widgets provided with such pages, or choose empty to start from a blank page.

To delete a page, move a page or duplicate a page, hold the page and drop it a the right place (trash, copy icon or move it to a different place.

Select for each page, the ones that are hidden or visible depending on the navigation type (back to takeoff, triangle, waypoint and competition task). Enabled means that the page is visible with every navigation type.

To reach this section, swipe down to open XCTrack menu → Preferences → Key bindings.
Select “Key bindings” to link the short press or long press of an available button to a given action. This can be pretty useful if you wear winter gloves that can not be used with touch screens.

By selecting a key related to brightness, you will increase or decrease the brightness of the screen by step of 10%. If you have set the brightness to be maximum at takeoff, by pressing once on a key that is linked to “decrease display brightness”, the brightness will be set on 90%.
By selecting a key related to Pan map, you will have the opportunity to set the Map panning relative step. Otherwise, this menu will be greyed out.
Pressing a key linked to map panning will activate this special mode (no need to configure a key to toggle map panning).

Map panning relative step allows you to decide how much pan you want to apply for each key stroke. 25% means that by pressing a key linked to “Pan map Left in panning mode”, the map will move so you can see the map on the left by 25% of the displayed map. If you select 100%, it means tha the map is totally replaced by the map that is situated on the left.

Landing detection
Can be set on Automatic, Manual or No detection. Automatic detection is based on speed and lift.
If you set the landing detection on Automatic, once XCtrack detects a landing, a new IGC will be created if a takeoff is detected afterwards. So, in case you are flying in heavy wind conditions and may stay at the same place at a very low speed, facing the wind, you may prefer the “‘manual” setting so that you would need to confirm “just landed” or “still flying” in case a landing is detected.
Takeoff speed
Can be modified if you want to have XCTrack detect more quickly the takeoff or avoid detecting a takeoff due to GPS inaccuracy move.
Mapping of events
Displays the events mapped with specific actions. Click on Edit next to the event, to modify it.

Click on “show all events” to display all the possible events, including the ones that are not set.

Mapping of events
For each event, you can choose an action amongst Page switch, Altering Display State or Altering Application state.
One of the main feature used with automatic actions is the switch to the thermal assistant page.
By default, once circling in thermal is detected, the page is switched to the thermal assistant page. Once XCTrack detects the pilot stopped thermalling, the page is automatically switched back if you have also set the second mapping of events related to “Stoped thermaling”. The detection of thermalling start/end is based on the following rules:
- XCTrack detects start of thermalling if there has been at least 90 degrees change in heading (not bearing) in last 30 seconds AND the vertical speed averaged over last 30 seconds is -0.5m/s or more (less the 0.5m/s sink or lift)
- XCTrack detects end of thermalling if there have been less than 30 degrees change in heading in last 30 seconds AND the vertical speed averaged over last 30 seconds is less than -0.5m/s
Another useful mapping of event used with AIR³ 7.1 was the Altering Display Stage set to Full backlight once the take off was detected.
Thanks to the very bright screen of AIR³ 7.2 and 7.3, this automatic action has been disabled as it is not required anymore to have the full brightness to get a good readability. However, new brightness button widgets have been created together with the release of AIR³ 7.2, so that the pilot can now easily decrease or increase the brightness depending on the readability conditions while flying. Read more details about these brightness buttons widgets in the Action buttons subsection of the XCTrack Pro widgets manual.
AIR³ 7.2 and 7.3 have a 10.000 mAh battery. Read more about autonomy in the FAQ. Thanks to the automatic action generated once the battery level has reached 5%, you can continue to fly with the acoustic vario and XCTrack continues to track.

AIR³ is provided with an accurate GPS and powerful pressure sensor.
We recommend to always use the internal very performing pressure sensor of the AIR³. Watch and listen to the videos comparing AIR³ vario and other flight instruments.
However, you still have the opportunity to connect an external sensor.
FAI CIVL compliance
Note that if you are using an external sensor, you will not comply with FAI CIVL rules and your IGC file will not be FAI compliant.
Once you have connected an external sensor (GPS and/or pressure), you can choose between the internal or the external sensor. Read also more details about the GPS/Baro source settings in the Action buttons subsection of the XCTrack Pro Widgets manual

Connection
Choose the type of external sensor to connect. Don’t forget to set the connection right at the system level. For example, the bluetooth sensor will not be accessible if the bluetooth is not enabled in the system.
XCTrack can parse both Flarm ($PFLAA) and Fanet ($FNNGB) strings.
Read more details about the way to use XC Guide as TCP external sensor in the XC Guide specificities for AIR³ page, providing XCTrack with different information that can be displayed on XCTrack map.
Once you have activated an external sensor, check the Status line to make sure it is working properly.
FANET/FLARM
AIR³ 7.3+ includes a FANET/FLARM module allowing XCTrack to transmit data to FANET and FLARM devices, and to receive data from FANET devices around.
Once the module is enabled, a new line appears with the validity of the Flarm licence. Check how to freely upgrade the FLAM licence through XC Guide in the XC Guide specific AIR³ features page.
Once you have activated the FANET+ module, check the Status line to make sure it is working properly.

EXTERNAL SENSORS – FANET/FLARM
With XCTrack 0.9.6.2 and above, you can use multiple sensors at the same time.
For example, you can enable the FANET/FLARM module with AIR³ 7.3+, allowing XCTrack to transmit data to FANET and FLARM devices, and to receive data from FANET devices around, as well as enabling TCP external sensor and have XC Guide running in the background, providing massive usefull data to XCTrack. Check more details about using XC Guide together with XCTrack in the XC Guide specific AIR³ features page.
Once you have activated an additional sensor, check the Status line to make sure it is working properly.
GPS
If you have connected an external sensor with GPS, you can enable the use of the external GPS or not.
As indicated above, this means your flight track (IGC) will not be FAI CIVL compliant.
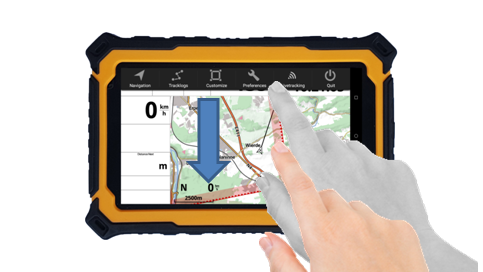
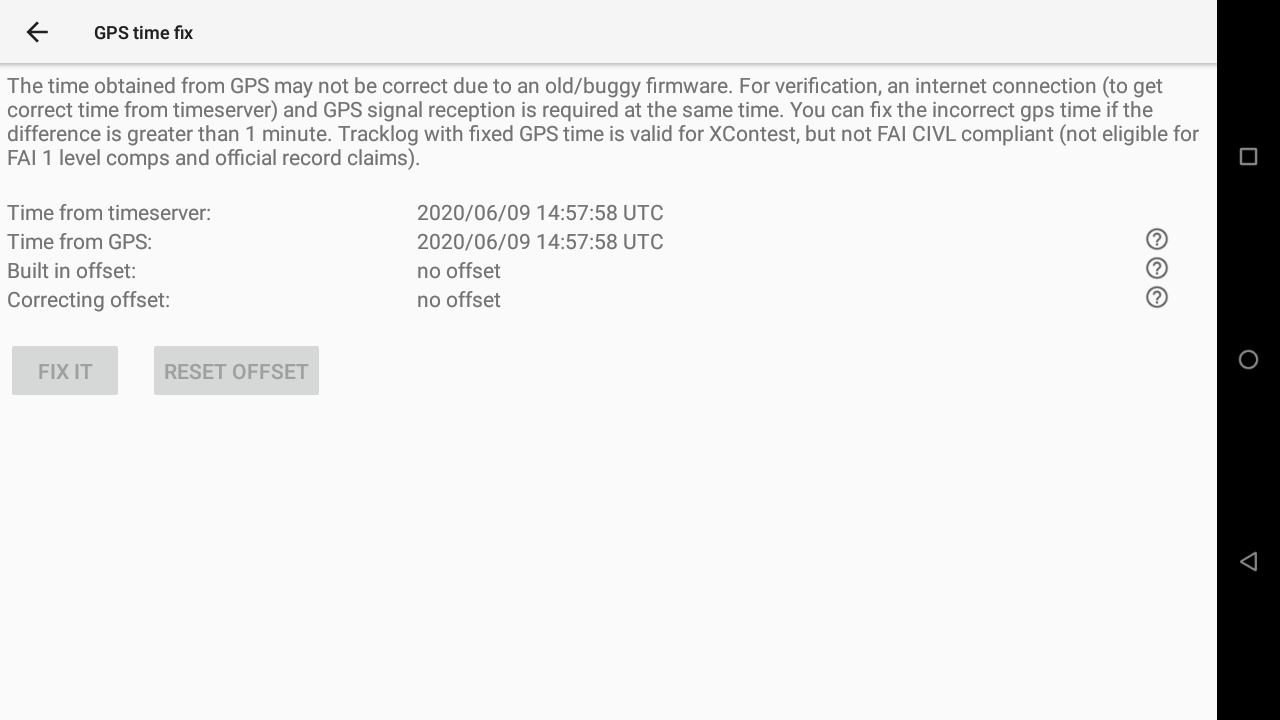
GPS time fix feature is available to solve the GPS week number roll over bug.
Just click on the button to use it.
Make sure you get a GPS signal and an internet connection.

The time obtained from GPS may not be correct due to an old/buggy firmware. For verification, an internet connection (to get correct time from timeserver) and GPS signal reception is required at the same time. You can fix the incorrect gps time if the difference is greater than 1 minute. Tracklog with fixed GPS time is valid for XContest, but not FAI CIVL compliant (not eligible for FAI 1 level comps and official record claims).
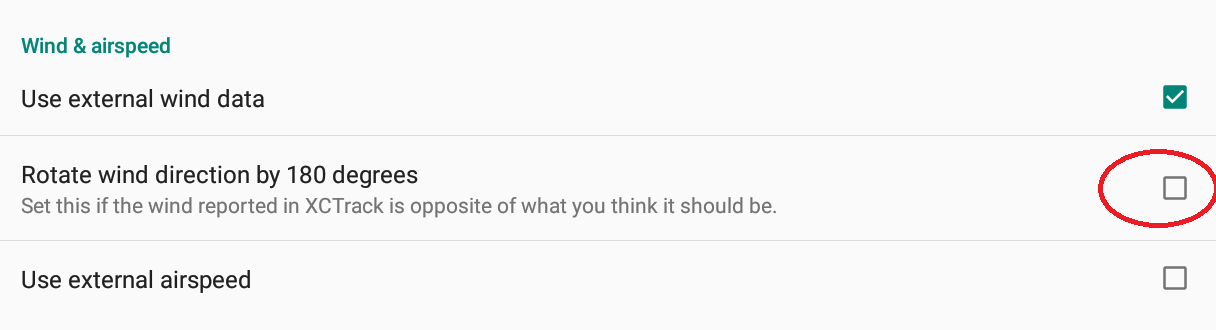
Wind and Airspeed
By default, XCTrack computes the wind during thermalling. From wind and ground speed XCTrack estimates the airspeed.
XCTracer and Digifly can provide these values to XCTrack. When the external wind is checked, XCTrack is not trying to compute the wind from circling. It will just grab the values provided by the external instrument.
By choosing external airspeed, XCTrack get the value provided by the instrument and displays it as is (Digifly air has a pitot tube).

Some external devices report wind direction in opposite manner. You can reverse the wind direction by selecting “Rotate wind direction by 180 degrees”.
Compass
By default, XCTrack uses the Bearing (track) direction thanks to the GPS, the wind speed and direction, to compute the Heading direction.
By enabling “Use internal compass”, XCTrack will use the information coming from the internal compass to display the Heading, instead of that computed Heading.
Both widgets “Digital Compass” and “Compass and Wind” in the navigation page of the XCTrack Pro widgets manual are influenced by this setting.
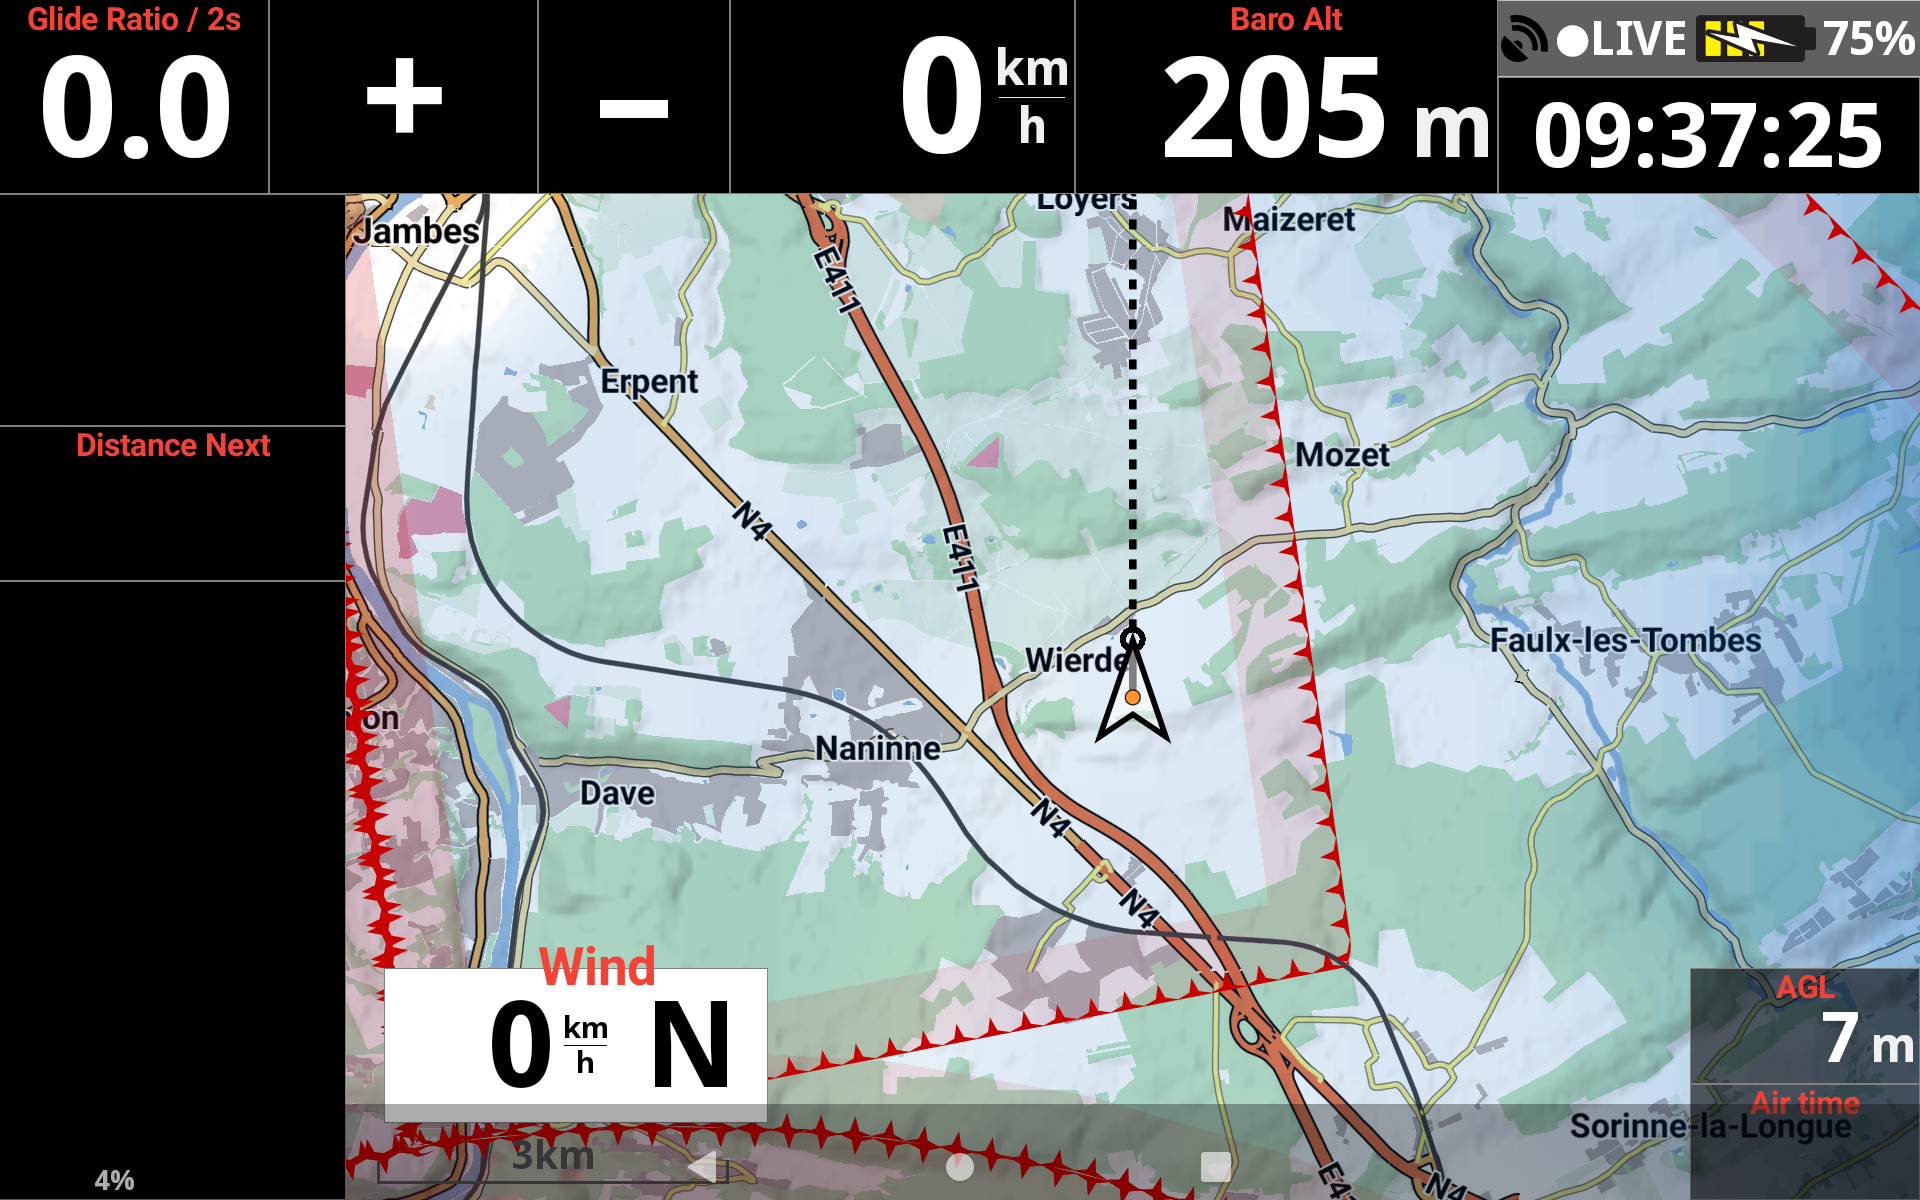
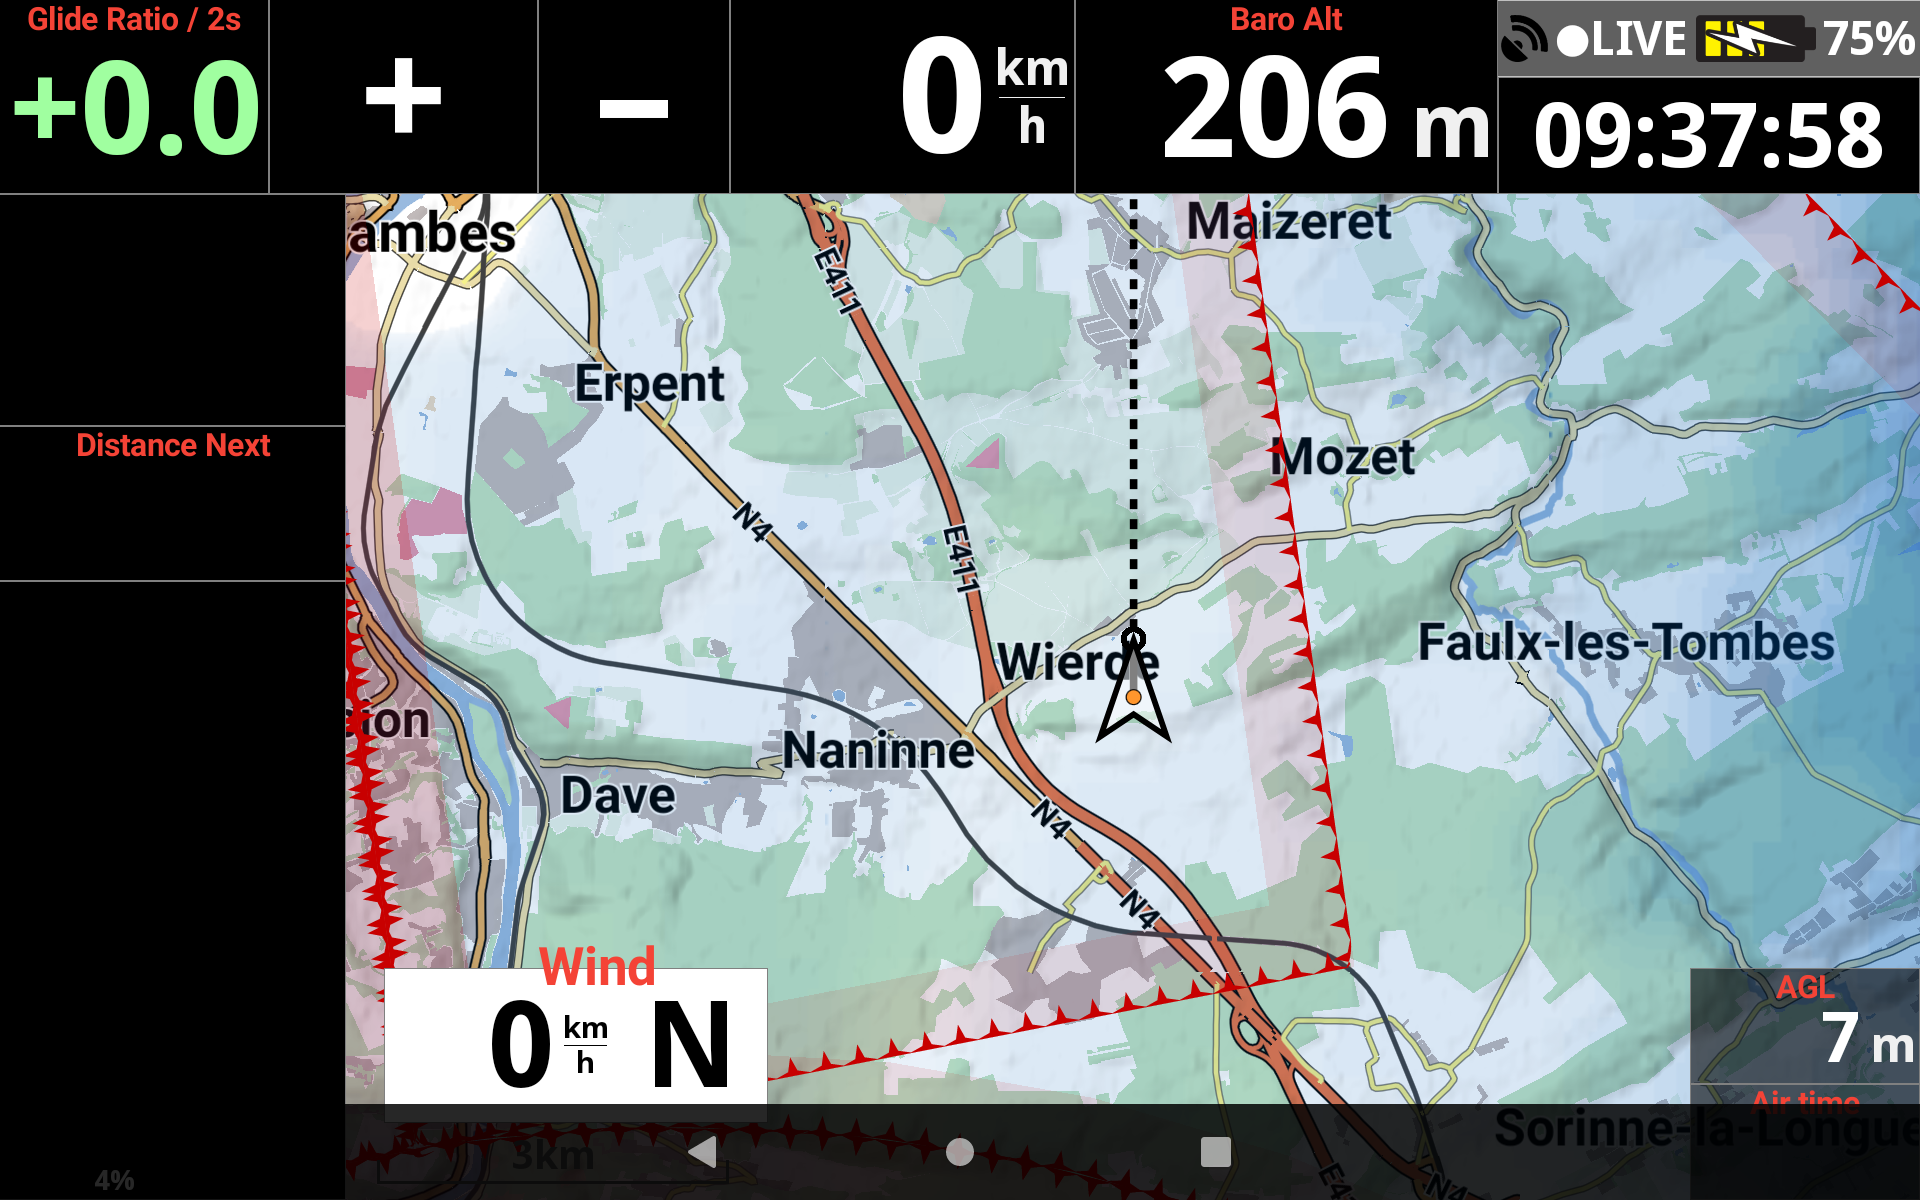
For each widget displaying a map, such as the Thermal Assistant widget in the Air page, the XC map widget of the Xcontest page and the Task Map widget of the Competition page of the XCTrack Pro widgets manual, the pilot arrow corresponds to the Heading, while the solid line in front corresponds o the Bearing. For each of these widgets, you can increase the size of the Pilot arrow in order to clearly identify the difference between the Bearing and the Heading. By enabling “Use internal compass”, you will use the internal compass for Heading instead of the computed Heading based on the wind.

To use the internal magnetic compass, you need to calibrate it.
If it is not calibrated, XCTrack will warn you and will indicate the percentage of calibration. You can calibrate the internal digital compass by making 8-like figures to improve calibration.
Once calibrated, XCTrack indicates “Compass is calibrated”


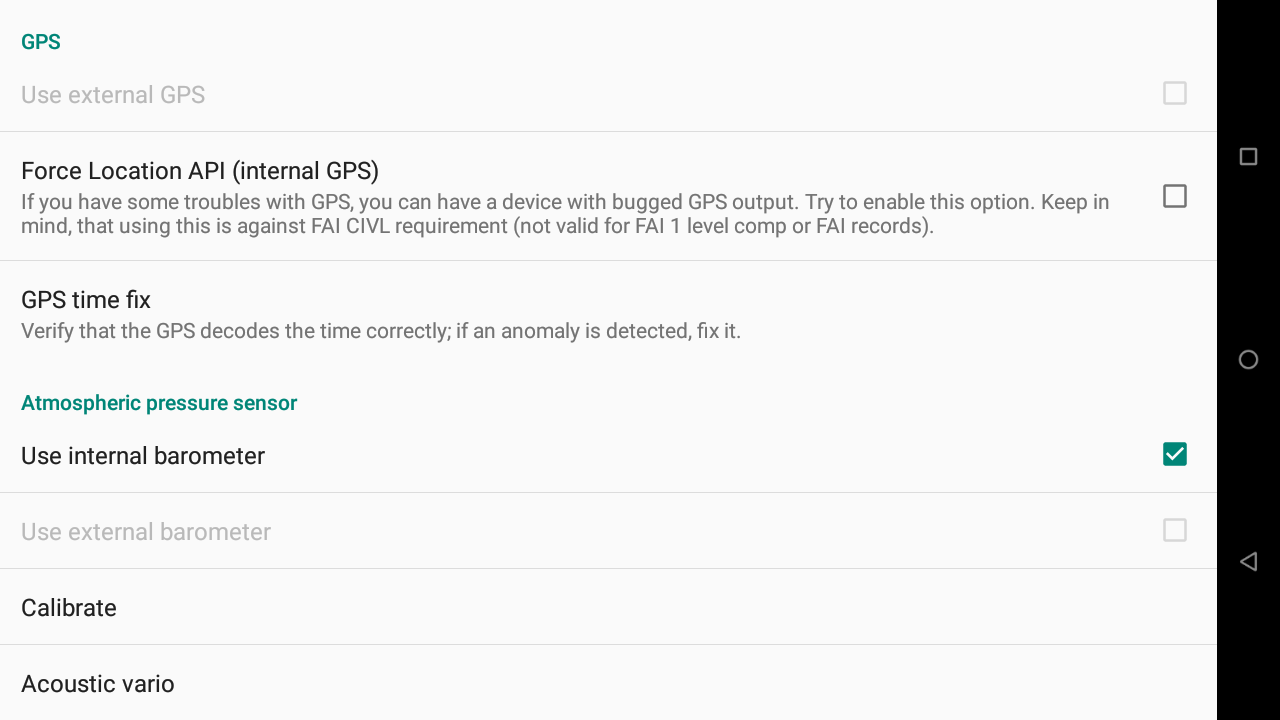
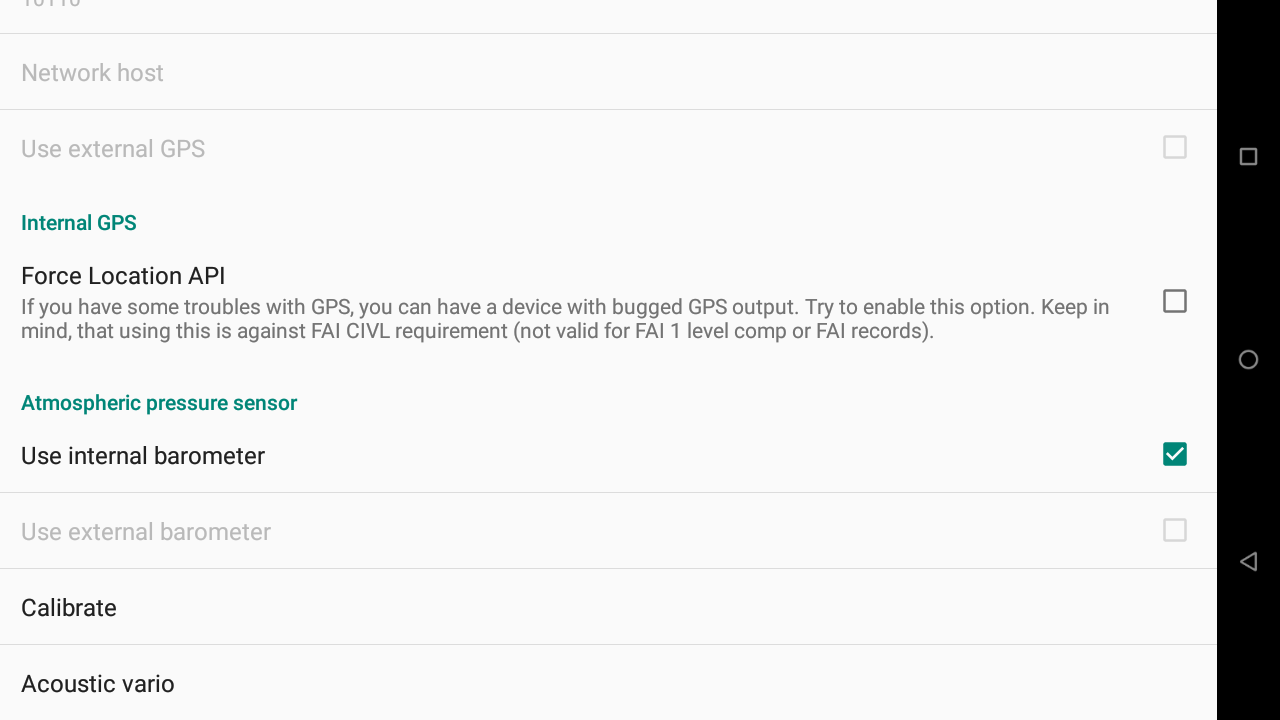
Atmospheric pressure sensor
If you have connected an external device with a pressure sensor, you can choose if you want to use the internal or the external barometer.
If you have activated the external barometer and there is no baro data available, XCTrack will warn you with the following sound unless you have deactivated this option in Menu/Preferences/Sound/Acoustic vario.
Calibrate (pressure sensor)
Choose Calibrate to calibrate the baro sensor (see below more details about the calibration).
Acoustic vario
Directly enter the Acoustic vario menu (see also Menu/Preferences/Sound/Acoustic vario explained in the Sound section above).
Click on “Calibrate” to calibrate the pressure sensor.
Pressure displays the direct info provided by the sensor in Pa. Just below the pressure, the frequency of pressure information received by XCTrack per second.
Altitude is the direct conversion of the standard pressure into altitude. The second value is the mean value and variant computed from raw values for the last 20 seconds.
The Smoothing slider allows you to apply a low pass filter on the data to avoid taking into account data coming from the sensor that are not coherent. The value corresponds to the weight of the low pass filter (by lowering the number, you limit the possible wrong values, but you also limit the vario sensitivity in case of big lift).
Lift is the resulting altitude difference per second computed after smoothing.

New feature as of XCTrack 0.9.8.7
This feature in previous versions was located in Menu/Preferences/Testing & Debug/Configuration. It only allowed the user to export the whole configuration and import the same. Often, users were importing the whole configuration to get a different page layout, but didn’t realize that the whole configuration was imported. This generated a lot of issues such as external sensor settings, specific sound settings, etc.
With this new feature, it is now possible to export only the pages and decide what to do when importing it. Unless the configuration comes from the same device, it is highly recommended to only export and import the pages. Not the rest of the configuration.
When you enter the menu, you can choose to export your configuration or import a configuration.
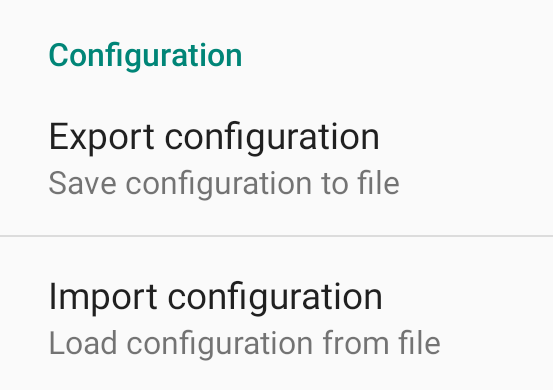
Export configuration

Choose if you want to only export the pages or the whole configuration.
In both cases, the file exported will be located in the Config subfolder of XCTrack.

If you have selected to only export the pages, the file name exported will contain “pages”. Once exported, you can click on the “share” button to directly send your files to the desired person. You can for example send it with Whatsapp, Gmail, Messenger or any other application that you would have installed.

If you have selected to export the whole configuration, the file name exported will contain “backup”. Once exported, you can click on the “share” button to directly send your files to the desired person. You can for example send it with Whatsapp, Gmail, Messenger or any other application that you would have installed.
Import configuration

If you click on Import configuration, XCTrack will check if there is a configuration file in the Config subfolder of XCTrack.
Select the file you want to import. If your configuration file is not located in the Config subfolder of XCTrack, click on “Other” and select the file where it is located.
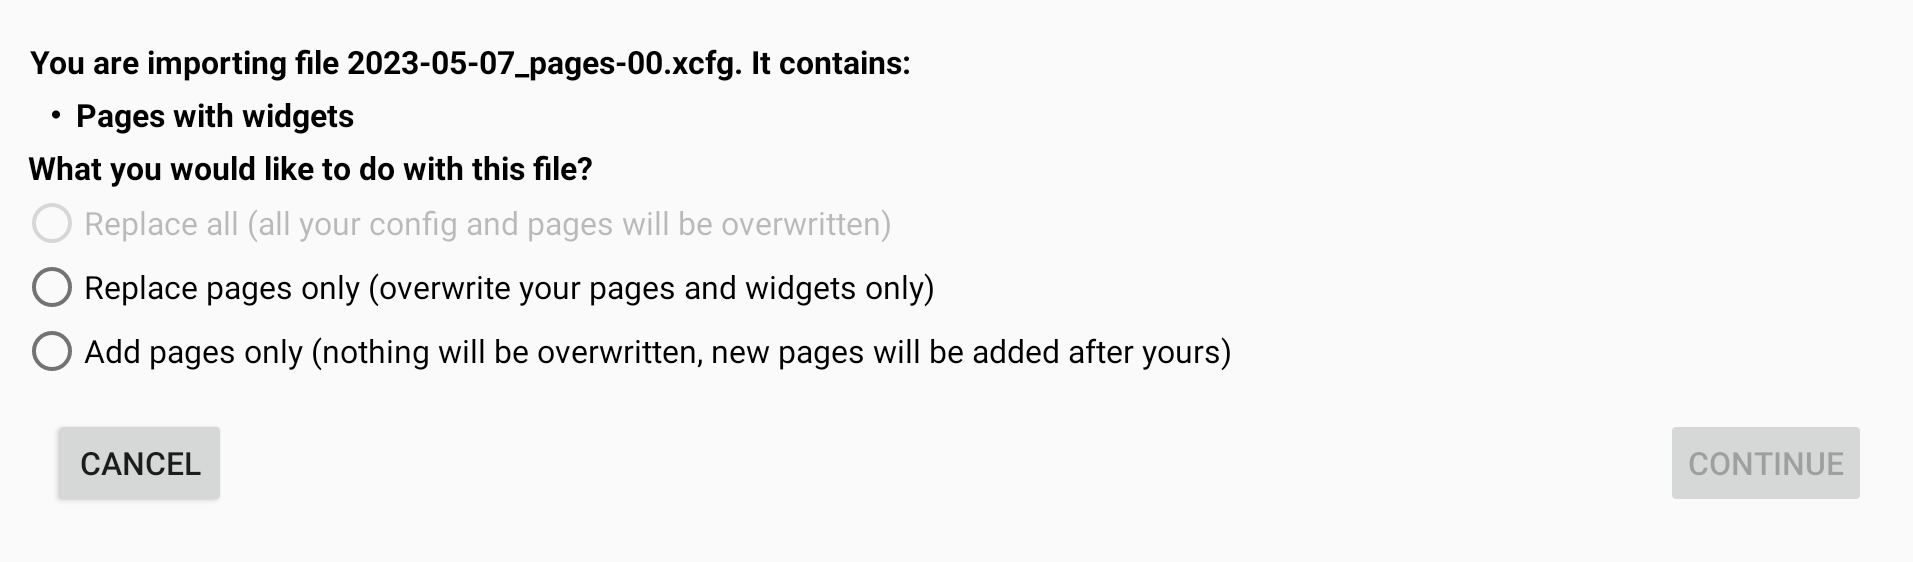
If you have selected a configuration file with Pages only, the first option is disabled. You can choose to replace the pages with the ones that are included in the configuration file, or to add these pages.

If you have selected a configuration file with the whole configuration, you have 3 options. You can choose to replace all, pages and every settings of XCTrack. This will overwrite everything. The second option is to replace the pages only with the ones that are included in the configuration file. The third option is to add the pages to the ones you currently have.

By replacing all, all custom configuration will be reset.

If you select to replace pages only, your pages will be replaced. Other configuration won’t be changed.

If you select to add pages, nothing will be overwritten.
Most of the features indicated in this section are self explained.

The testing and debug section is mainly used for advanced users. Most of the features are self explained.
Configuration
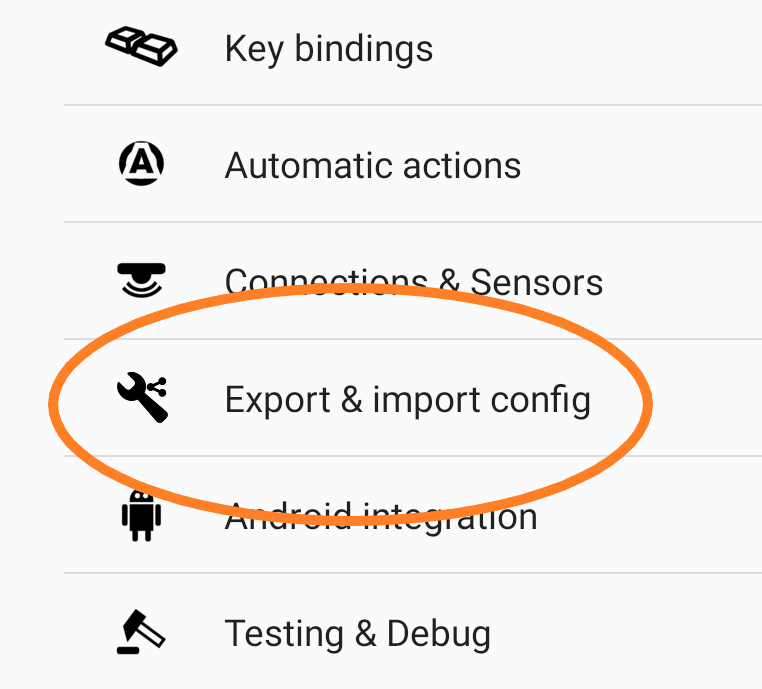
As of XCTrack 0.9.8.7, the export and import configuration features are located in Menu/Preferences/Export & Import config.
AIR³ is provided with a perpetual licence of XCTrack Pro. The licence is linked to the instrument and not the pilot.
If you like XCTrack, consider supporting further development with a small amount of money. Click on “Donate” and follow the steps.
Note that if you want to subscribe to get the Pro version on a different device, the subscription will be linked to the pilot. Make sure your credentials are correctly entered in the Pilot section (see above).
XCTrack Pro contains many features that are not available in XCTrack (standard). There will be more and more additional features available to the Pro version in the coming releases. These new features will be available to the pilots that have subsribed to the Pro version through the upgrades.

If you are using XCTrack with another instrument and would like to get the Pro version, you can get the Pro version by subscribing. Check your Pilot’s credentials in the Pilot section detailed above (Menu/Preferences/Pilot).

Each euro will give you access to 1 month of XCTrack Pro.

Next section